• Home
    • Recipes
    • The Roast Chicken Project
    • Allie Dreams of Cake
    • Sunday Suppers
  • Travel
  • About
Menu

Tea and Fog

Street Address
City, State, Zip
Phone Number

Your Custom Text Here

Tea and Fog

  • Home
  • Recipes
    • Recipes
    • The Roast Chicken Project
    • Allie Dreams of Cake
    • Sunday Suppers
  • Travel
  • About

Sunday Supper: Salt Baked Whole Fish

July 8, 2018 Allie
Salt Baked Whole Fish

There's something about baking an entire fish, head to tail, that tends to scare people off. I get it, since it took me a few tries not to be squeamish while staring into that milky eye whenever I order roasted fish in restaurants.

But the benefits of roasting a fish whole should really encourage more people to do it. It's cheaper per pound, since you aren't buying a precisely cut filet, and it's almost impossible to screw up, since roasting the meat around the bones and sealed in the skin makes it hard to overcook. Plus, you can stuff the cavity with all kinds of aromatics that give the fish lovely added flavor! 

Just don't stare the fish dead in its dead, white eyes and you'll be fine.

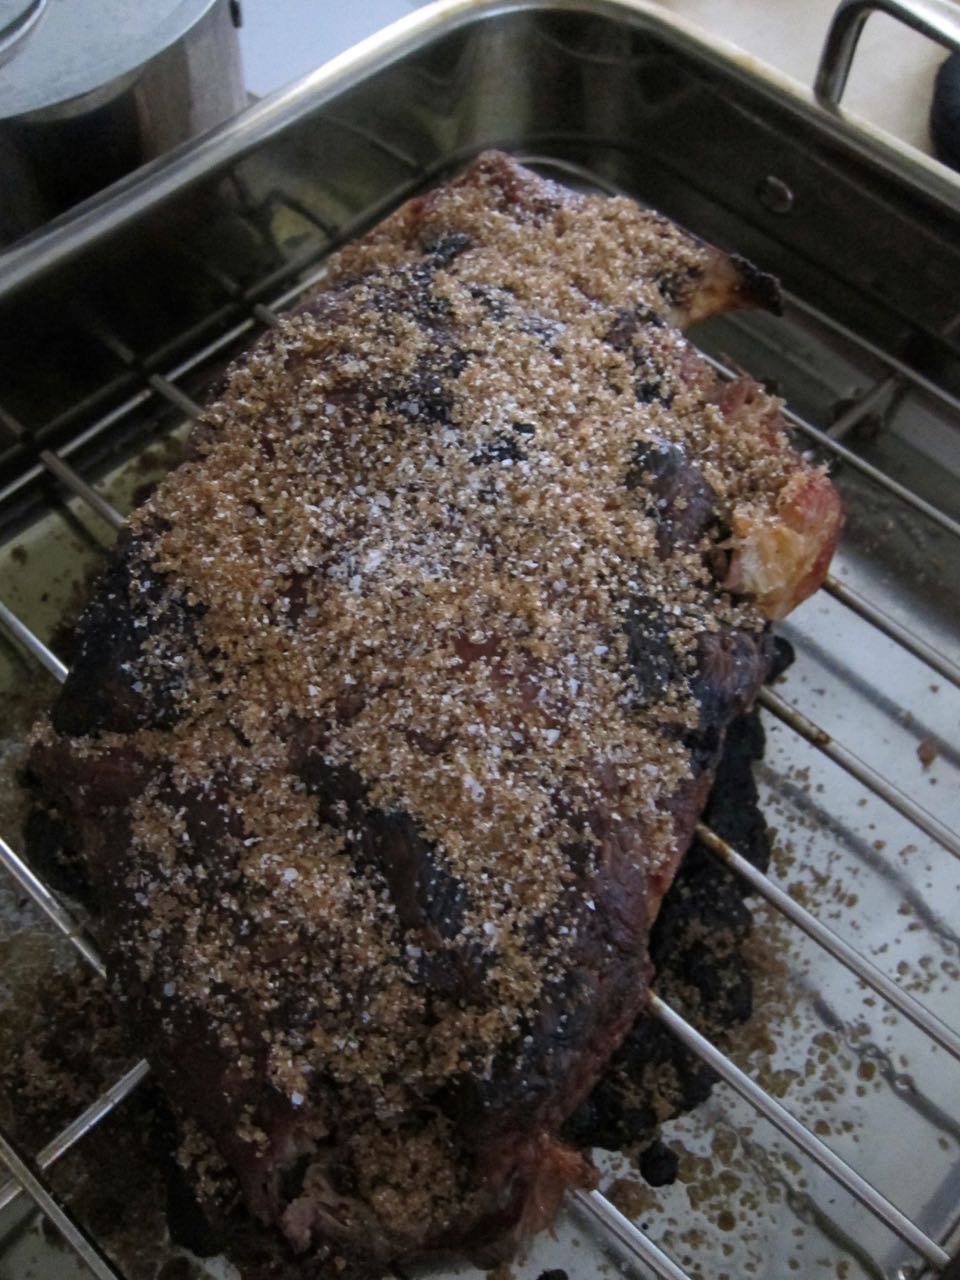
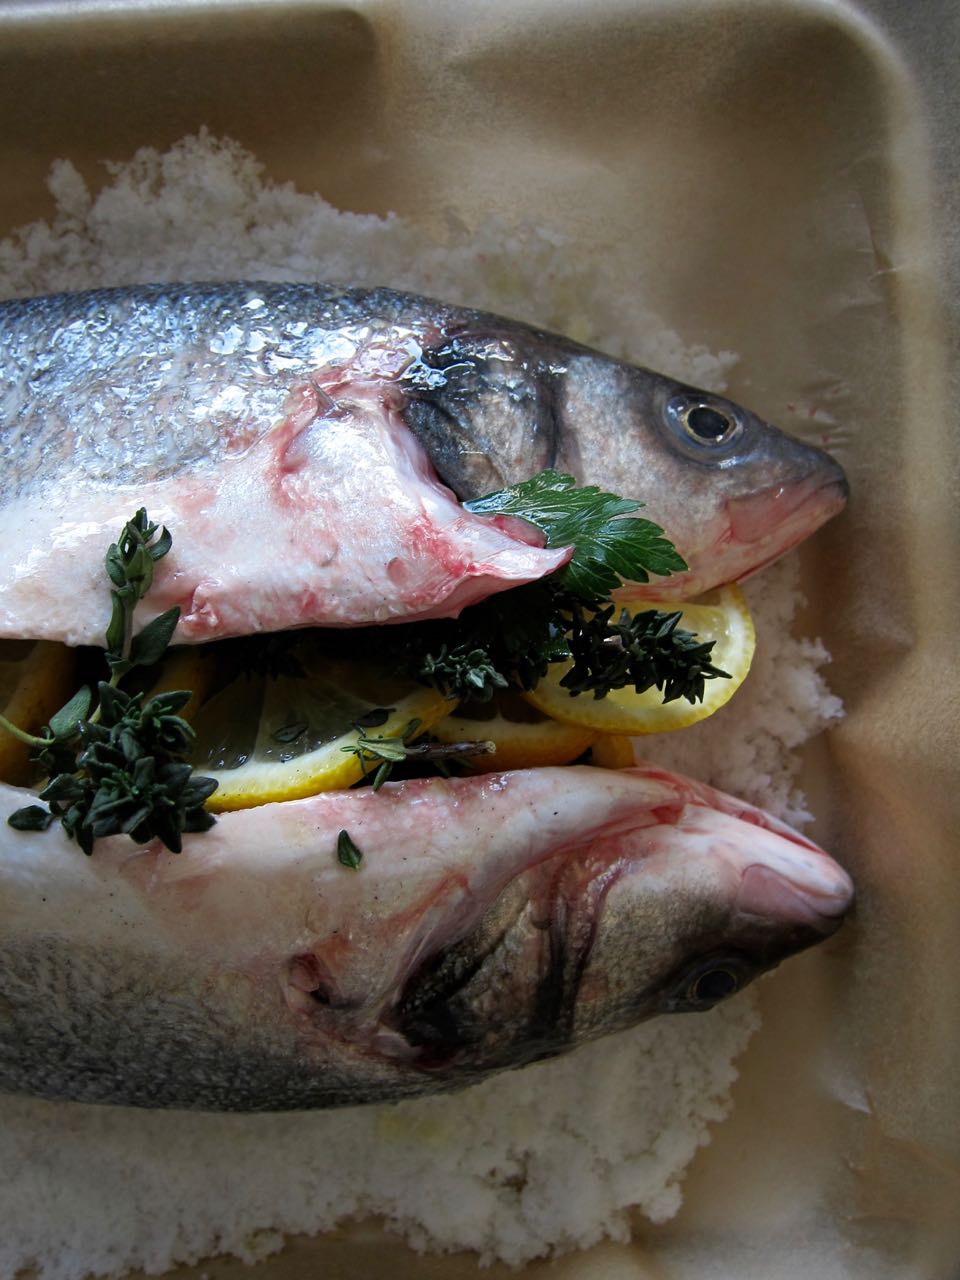
Here, I've taken the added step of encasing the fish in a salt crust, which both seasons the fish and steams it, yielding beautiful, delicious, moist fish. Serve it drizzled with a little olive oil and it is sublime. Also? Cracking into that baked crust is second only to the fun of breaking into a creme brulee.

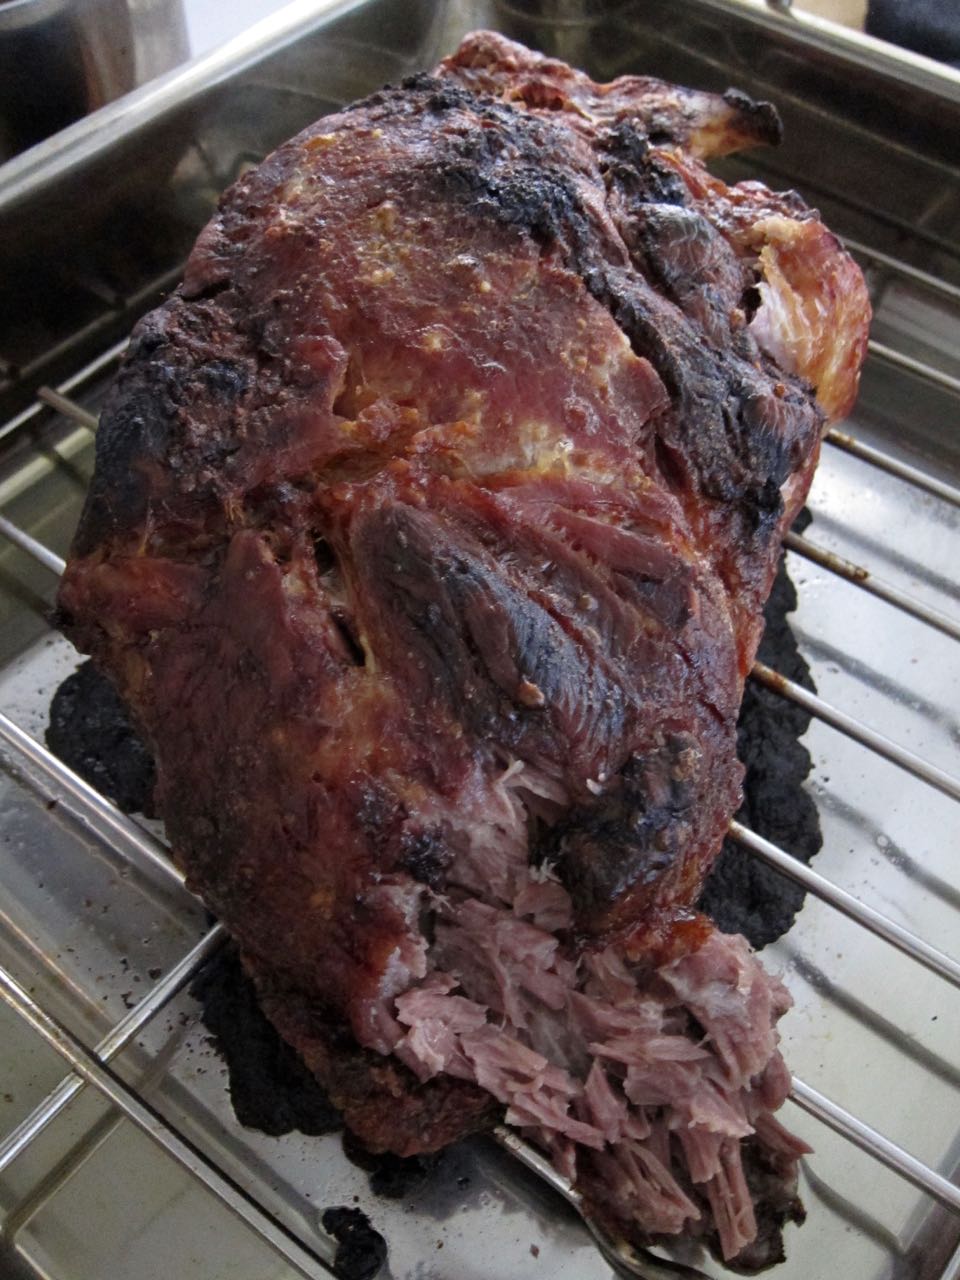
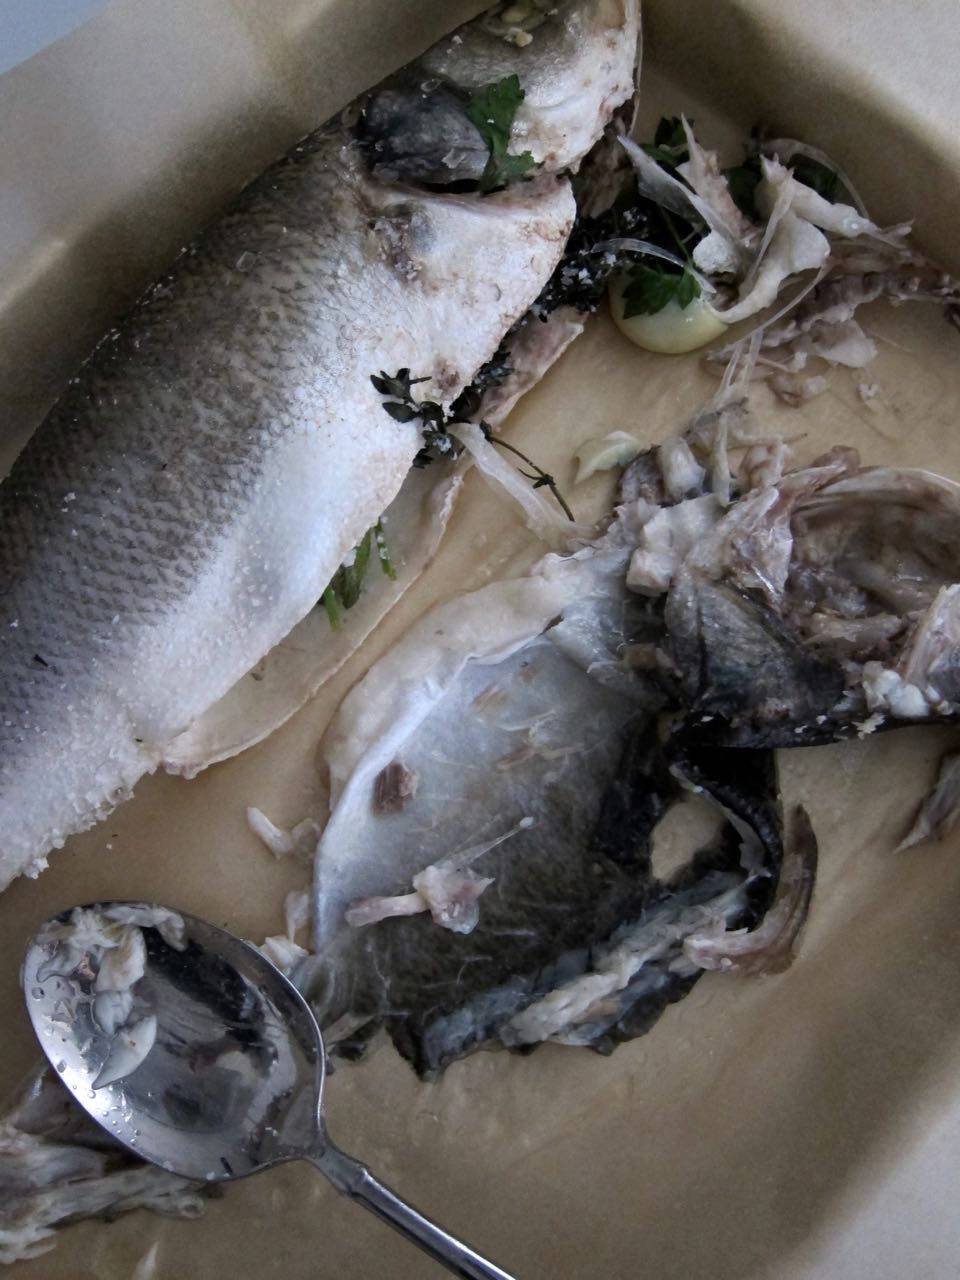
Now, somebody just teach me how to properly flake this thing apart after cooking. Other recipes tell me it's a simple matter of pulling the flesh from the spine and lifting it off with a fork. My little pile of shredded fish was fun, but I don't think that's really how it was supposed to turn out. Hopefully you have better luck, and play a less dangerous guessing game with the pin bones.

Whole Fish Baked in Salt
salt packed stuffed whole fish
Baked Salt Packed Whole Fish
Stuffed Whole Fish.jpg
Filleted Whole baked fish.jpg
Salt Baked Fish Fillets

Whole Salt Baked Fish

Adapted from Dave Pasternack

  • one, 2 lb whole fish (or two, 1 lb whole fish) such as branzino, black bass, etc., cleaned and scaled
  • 2 lbs kosher salt or fine sea salt (about 3 cups)
  • 3 large egg whites
  • extra virgin olive oil, for brushing and serving
  • parsley, thyme, lemon slices, garlic, for stuffing
  1. Heat oven to 425. Bring fish to room temperature for 20 minutes. In a large bowl, mix salt and egg whites until mixture is the texture of moistened sand.
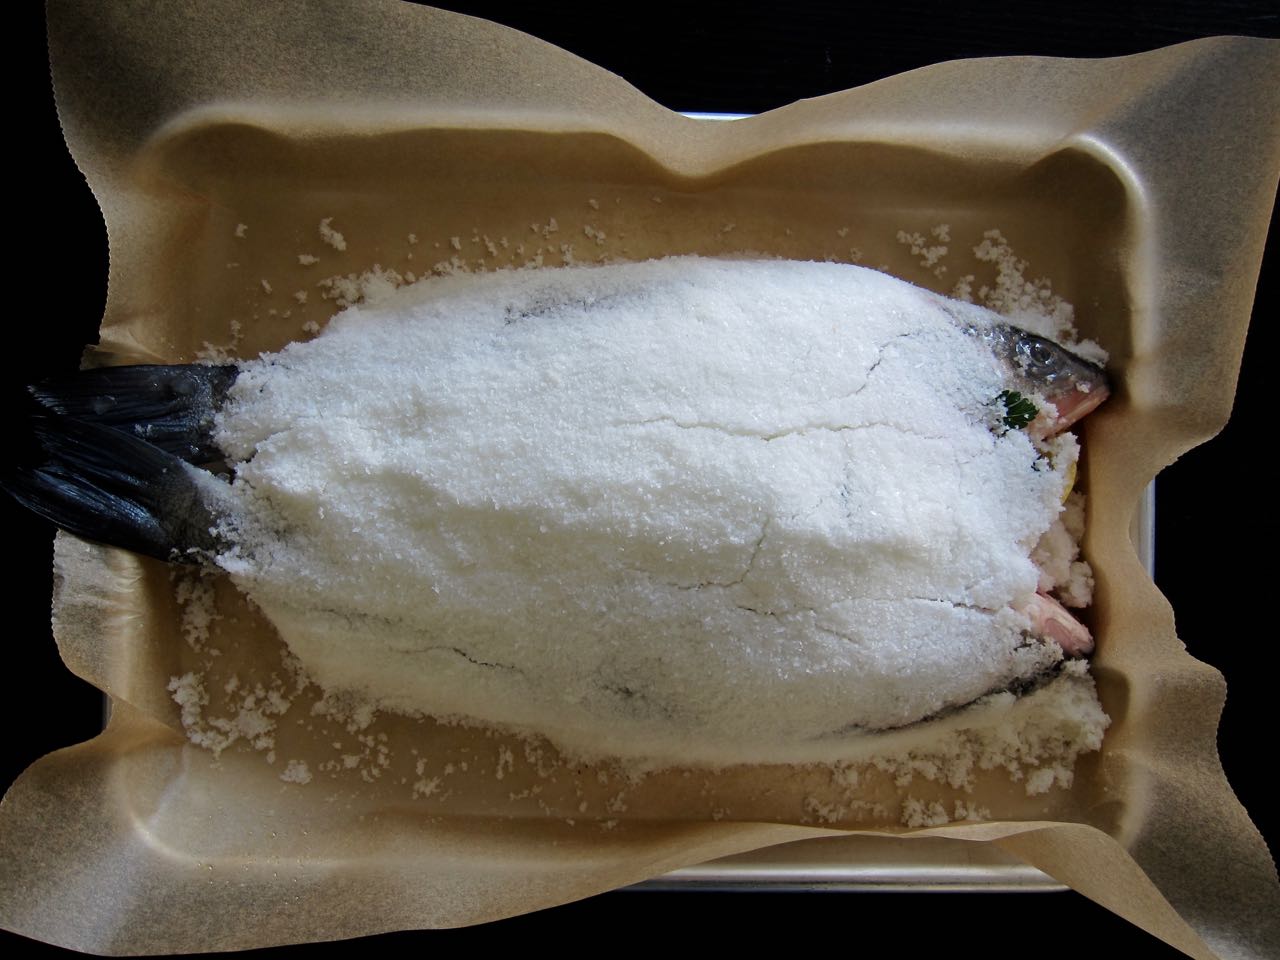
  2. Line a baking sheet with parchment paper and brush with oil. Sprinkle a bit of the salt mixture into a thin layer in roughly the shape of your fish. Brush fish with oil and set on top of the layer of salt. Stuff with sprigs of parsley, thyme, lemon slices and a clove of garlic in each fish, then top with remaining salt mixture and lightly pack. It's ok if tails and heads poke out a bit at the ends (if you manage to completely enclose your fish, use a skewer to poke a hole through the salt pack near where the head meets the body).
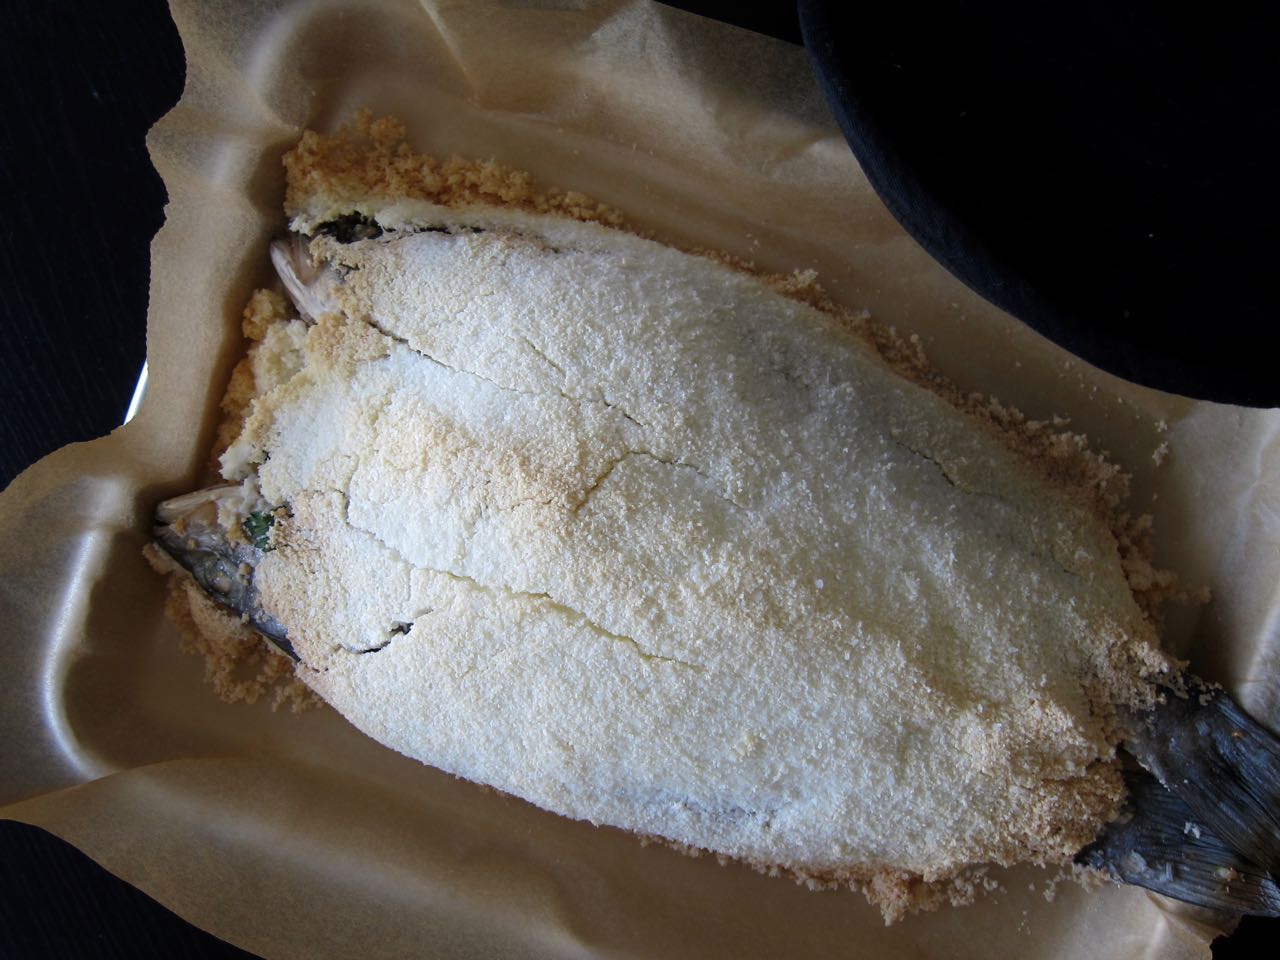
  3. Bake fish for 25 minutes, to about 135 degrees. Let stand 10 minutes, then crack the salt and discard. Brush off any excess salt, remove skin and stuffing, then debone and fillet the flesh (my strategy is to remove the top filets with a spoon, lift out the spine, remove any visible pin bones, and then chew VERY carefully while eating). Serve, drizzled with olive oil.
In Recipes, Sunday Suppers Tags Main Dish
Comment

Carne Asada with Pico de Gallo and Homemade Tortillas

June 3, 2018 Allie
carne asada feast

I'm looking at that pink-centered meat and I don't even know who I am anymore! It's so beautiful and doesn't gross me out in any way whatever. My younger self is recoiling in horror. Maybe there is hope for sushi yet?

The carne asada I'm drooling over is from Roy Choi. Skirt steak gets dunked in a flavorful marinade infused with mirin and citrus, then grilled or broiled to perfect tenderness. The accompanying pico de gallo gets a slight Korean twist of heat through some gochujang, and together, they are really pretty excellent! I first tried out this recipe a few years ago for a beach vacation, and while it was delicious, it also suffered from the lessons I learned about cooking for and feeding a group of 18 friends, so I was eager to try it again in the quiet and calm of my own kitchen. I'm so happy I did.

Aside from the beef, the other stars of this show are the tortillas. Have you tried making your own before? I've done corn tortillas a few times, but I hadn't really ever attempted flour tortillas, ever since Claire and I took a tapas cooking class together in Boston where the group making the tortillas produced more of a chewy, flavorless flatbread. But Claire had told me that the recipe in Mark Bittman's baking book was delicious and easy, and who am I to argue with Bittman? I made a batch one day to use up some leftover Bo saam, and blew myself away with my skillz. These are far easier and quicker to make than you'd imagine, and if you use a good butter or oil and plenty of salt, not at all like a bland flatbread! I haven't bought tortillas in two months.

You can make the pico de gallo ahead of time, when you add the meat to the marinade. The flavors will be even better incorporated after a sleep in the fridge. You can roll and cook the tortillas in advance as well, or just before you want to cook the meat. They will stay warm and soft tucked into a towel. Once you've got your meet cooked to perfection, slice it and serve with the pico and maybe some charred scallions, and tuck it all into your perfect tortillas. Serve with beer and you are having your best Sunday ever.

carne asada with pico de gallo and tortillas
Pico de gallo
tortilla dough.jpg
rolling flour tortillas.jpg
cooking flour tortillas.jpg
homemade flour tortillas.jpg
carne asada
Carne Asada with homemade tortillas

Carne Asada with Pico de Gallo and Homemade Tortillas

Carne Asada and Pico de Gallo from Roy Choi via Sam Sifton, tortillas from Mark Bittman

For the Carne Asada:

  • 2 jalapeΓ±os
  • 1 medium tomato, cored and cut into quarters
  • 1 small yellow onion, peeled and cut into quarters
  • 5 cloves garlic
  • 2 tablespoons granulated sugar
  • ΒΌ cup ancho chili powder
  • 1 tablespoon ground black pepper
  • 1 tablespoon kosher salt
  • Β½ large bunch cilantro, leaves and stems, well rinsed
  • β…“ cup fresh-squeezed orange juice (from about 1 orange)
  • 3 tablespoons fresh-squeezed lime juice (from 1 or 2 limes)
  • ΒΌ cup mirin
  • 1 12-ounce can (1 1/2 cups) Mexican lager beer (I used Corona)
  • 1.5-2 pounds skirt steak, cut into a few large pieces
  • 2 tablespoons olive oil

For the Pico de gallo

  • Β½ red onion, peeled and chopped finely
  • Β½ bunch cilantro, both leaves and stems, roughly chopped
  • 3 scallions, white and green parts, thinly sliced
  • 5 medium tomatoes,  and chopped into a small dice
  • 1 tablespoon gochujang
  • 1 tablespoon kosher salt
  •  Juice of 1 lime, plus more to taste

For the tortillas:

  • 1 1/2 cups flour plus more for rolling
  • 1/2 tsp salt
  • 2 tbs fat (neutral oil, olive oil, or softened butter)
  • 1/2 cup boiling water
  1. Make the marinade: Heat your oven's broiler and roast the jalapenos on a baking sheet, turning as needed, until the skins are black, blistered and charred. Place peppers in a plastic, sealable bag or wrap in foil and let steam for a few minutes. Then remove and peel jalapenos, discarding the skins, stems and seeds. 
  2. Place the jalapenos in a blender, along with the tomato, onion, garlic, sugar, chili powder, black pepper, and salt and pulse to blend. Add the cilantro, orange juice, lime juice, mirin, and beer and blend until you have a smooth marinade. Place the pieces of beef into a large gallon sealable bag or in a large bowl and cover with the marinade. Seal the bag or cover the bowl with plastic wrap and refrigerate overnight or for at least 4 hours.
  3. Make the pico de gallo: In a large bowl, combine all ingredients. Taste, and adjust for salt and add more lime juice if you want. Cover and refrigerate until needed. 
  4. Make the tortilla dough: In a food processor or in a large bowl, combine flour and salt. Pulse in (or stir) the fat until incorporated throughout. Add the boiling water and pulse to combine until the dough forms a ball. If using a food processor, run for another minute, and if not, knead the dough for about 5 minutes on a lightly floured counter. Wrap dough in plastic and let rest at least 30 minutes at room temperature. At this point, you can refrigerate it until you need it, but make sure you bring it back to room temperature before rolling tortillas.
  5. When you are ready to cook, heat a grill on high, an oven to high heat, or turn on your broiler. If using the oven, preheat a baking sheet.
  6. Make the tortillas: divide the dough into 8 pieces and roll into balls. Let rest on a lightly floured surface, covered, for about 10 minutes. Heat a large, heavy skillet (cast iron is best) over medium-high heat. Roll the tortillas out into circles one at a time (or you can use a tortilla press if you own one) to as thin as possible, at least 8 inches across. Place the rolled dough onto the hot skillet and cook 1-2 minutes, until dough turns opaque and brown spots begin to appear. Flip and cook another minute on the other side. Adjust the heat as needed and repeat with remaining dough, tucking the cooked tortillas into a clean kitchen towel to stay warm.
  7. Cook the meat: to your heated grill or oven, place the meat (on a pre-heated baking sheet please if using the oven) and cook to desired doneness, about 10 minutes for medium rare. (This took a little longer in my oven because my broiler doesn't like to stay on.) Let the meat rest for a few minutes while you gather your tortillas and pico de gallo. This is the time to grill or char some scallions if you like. Slice the meat against the grain, and serve!

Notes:

  • This pico de gallo recipe makes A LOT. I'm talking about a large mixing bowl full, so adjust the amount accordingly. If you are sharing with friends, it is perfect with tortilla chips.
In Recipes, Sunday Suppers Tags Main Dish
Comment

Sunday Supper: Bo ssam

April 7, 2018 Allie
momofuku bo ssam

What did you do last Sunday? It was Easter, so maybe your day involved a roast of some kind, maybe a ham? Or a leg of lamb? 

My day was very quiet. I recovered from accidentally-ish walking 12 miles on Saturday by laying on my couch, editing podcasts, reading, and watching TV. It was lovely, and as I went about my day, my apartment gradually filled up with the smell of a giant shoulder of pork slowly cooking and collapsing in the oven.

Hello.

I mention what I did all day Sunday to prove that this, the Momofuku Bo ssam, may just be the ultimate Sunday Supper. David Chang hasn't steered us wrong here. On Saturday night, give your pork a jacket of salgar (where my Parks & Rec fans at?) and tuck it into the fridge to sleep. Then, on Sunday, about 7 hours before you want to eat, shove it in a low oven, and go about your day. Seriously, just continue to do everything you were already going to do! The original recipe says to baste with pan juices after the first hour, but I didn't really have any pan juices until hour 3 or 4, so I didn't really baste and I'm ok telling you to ignore that step. 

About 6 hours later, after you've enjoyed a full Sunday, pull this baby out of the oven to rest, and assemble all your sauces and accompaniments. Snack on pieces of pork as you do this, as is the chef's right. Then, spread on a layer of brown sugar (optional if you have sensitive smoke alarms) and put it back in the oven, under the broiler, to crisp up.

Take it out, serve immediately, hopefully to a crowd, as this makes a ton. Or, you know, to yourself, and recognize that it's ok to make a massive amount of food for one. You're worth it, and you have a freezer.

bo ssam sauces
roasted pork butt.jpg
roasted bo ssam.jpg
lettuce wrap pork
bo ssam spread

Momofuku's Bo ssam

Adapted from Sam Sifton 

For the meat:

  • 1 bone in pork butt (shoulder), about 8 lbs
  • 3/4 cup white sugar
  • 3/4 cup kosher salt, plus 1 tbs (optional)
  • 7 tbs brown sugar (optional)

For the Ginger-Scallion Sauce:

  • 2 1/2 cups thinly sliced green scallions
  • 1/2 cup peeled, minced ginger
  • 1/4 cup vegetable oil
  • 1 1/2 tsp soy sauce (light, if you have it, otherwise reduce the salt a bit)
  • 1 tsp sherry vinegar
  • 1/2 tsp kosher salt

For the Ssam sauce:

  • 2 tbs ssamjang (fermented soybean and chili paste, see note)
  • 1 tbs gochujang (see note)
  • 1/2 cup sherry vinegar
  • 1/2 cup vegetable oil

For serving:

  • cooked white rice
  • lettuce leaves, such as bibb or butter lettuce, washed and dried
  • kimchi
  1. Place the pork on a rimmed baking sheet large enough to comfortably hold it (I used a quarter sheet pan with no issues). Pat the meat dry with paper towels, then mix together your white sugar and salt. Rub it all over the meat, cover in plastic wrap, and chill for at least 6 hours, but it's better to do this overnight. If you plan on cooking this same day, you'll be up at 6 am for this step.
  2. About 7 hours before you want to eat, heat the oven to 300 degrees. Unwrap the pork and transfer to a roasting pan. Slide into the oven, and walk away. Just walk away. If you have pan juices and you want to baste after a couple hours, you do you, but otherwise, just let the meat cook and collapse in on itself. After 6 hours or so, remove from the oven to rest up to an hour while you make your sauces.
  3. Make the scallion ginger sauce: Combine all ingredients, and taste and adjust for salt if needed.
  4. Make the ssam sauce: Combine all ingredients and mix well. If you have trouble getting the mixture to emulsify, you can blend it, or do as I did and add about a teaspoon of mayonnaise and whisk it in. 
  5. Prepare all your accompaniments. Make some rice, wash and dry your lettuce, get your kimchi into a bowl, sneak bites of pork.
  6. When you are ready to eat, heat oven to 500 degrees. Mix remaining tbs of salt and brown sugar together and rub over the cooked pork (or skip the sugar if you fear it will lead to an interview with the fire marshall or an irate neighbor). Place pork back in the oven for 10-15 minutes. If you a using the sugar, it should create a dark, caramel crust or at least a smoky inferno. Serve immediately, with windows open, while hot, with all accompaniments.

Notes:

  • I do love all the people in the original recipe comments who are like, "I made this except without the sauces and without the salt/sugar rub and the fat" and really, why?  Don't be like them. Yes, it's salty, and yes, it's fatty, but that's the point! I found that it helped to mix the crusty bits in with the middle bits, to really even out the saltier bites. And don't skip the sauces! They are easy but most importantly, extremely tasty and are there to balance the meat. The ginger scallion sauce especially is my new love. You may want to double the amount called for, since I went through the entire batch with only half the pork.
  • I probably could have cooked it longer to get that true falling apartness in the middle, so I would say you could cook this up to 7 hours, initially.
  • I may use a disposable pan next time, as the sugar didn’t so much as caramelize as fall into the pan and burn, which wasn't fun to clean. If you can't tell from above, I also would skip the brown sugar step next time, as my weak apartment ventilation can't really handle it. The sugar also didn't really stay on the pork, but other recipe commenters mentioned creating more of a paste with either cider vinegar or some of the pork juices. If you have a strong stove hood or an outdoor setup, well, I'm jealous of your candied pork bark crust.
  • The ssamjang and gochujang are more widely available now, and gochujang at least is fairly easy to find at most grocery stores. Ssamjang can be found online (link below) or at dedicated Asian markets. I ventured out to a Korean market in the city to find it here.
ssamjang sauce (Singsong Brand) 170g
Chung Jung One Sunchang Hot Pepper Paste Gold (Gochujang) 500g
In Sunday Suppers, Recipes Tags Main Dish
Comment
← Newer Posts Older Posts →

For those who plan their next meal while eating the last.

Β 

INSTAGRAM

🎢When pizza’s on a bagel*, you can have pizza anytime**!🎢

*donut
** after you fry some donuts
FINALLY perfected these Burnt Honey Butter Biscuits & what good timing! It’s carb season & we are all hibernating! 🐻
Final thoughts on Small Thanksgiving: take your sweet potato + marshmallow combo firmly into dessert or even breakfast, and consider a cozy mashed potato soup with stuffing croutons to use up those leftovers. Stay safe & Happy Thanksgiving! πŸ˜·πŸ¦ƒ
Part 2 of Small Thanksgiving: all the stuff to stuff yourself with! An Italian sausage pasta-inspired stuffing and a vegetarian, spiced wild rice stuffed squash. Everything serves 4-6, gather safely this year! πŸ˜·πŸ¦ƒ #thanksgiving #smallthanksgiving #v
Now that we (and the world?) can let out that collective sigh of relief, I can  finally think about my favorite holiday! Everyone is probably (hopefully 😷)looking at smaller gatherings this year, so I’m sending some Small Thanksgiving ideas ou
So happy Disney keeps justifying my dumb baking purchases! This matcha shortbread is delicious, but make a good sandwich cookie it does not. I hid all the broken pieces πŸ™ˆ
Subscribe to Tea and Fog!

RECENT RECIPES

Featured
polenta with rosemary and goat cheese.jpeg
Salmon Wellington and Warm Rice Salad.jpeg
Pizza Donut Hero.jpeg
Burnt Honey Butter Biscuits.jpeg
Mashed Potato Soup with Stuffing croutons.jpeg
sweet potato donuts with marshmallow frosting.jpeg