• Home
    • Recipes
    • The Roast Chicken Project
    • Allie Dreams of Cake
    • Sunday Suppers
  • Travel
  • About
Menu

Tea and Fog

Street Address
City, State, Zip
Phone Number

Your Custom Text Here

Tea and Fog

  • Home
  • Recipes
    • Recipes
    • The Roast Chicken Project
    • Allie Dreams of Cake
    • Sunday Suppers
  • Travel
  • About

Basic Sprinkles & Frosting Cake

April 24, 2018 Allie
sprinkles and frosting cake

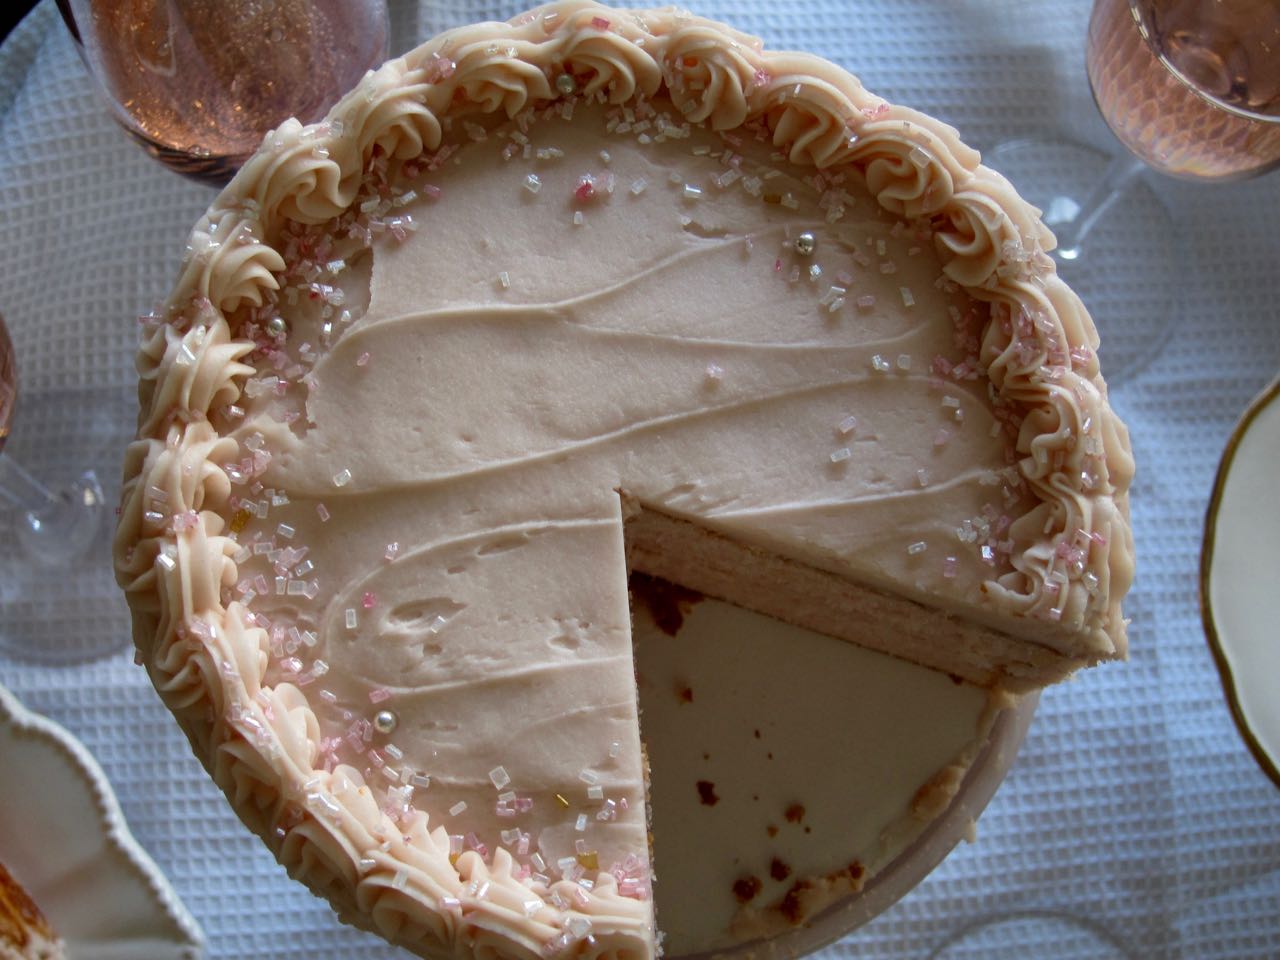
Maybe this cake is basic as in basic, with it's millennial pink coloring and rainbow sprinkles that suggest I've been paying attention to Pinterest's obsession with all things "unicorn", but it's also basic in that I made a pretty standard cake of fluffy vanilla, sweet frosting, and sprinkles. That's it! Simple and pretty. It's up to you how aggressive you want to be with the sprinkles, but otherwise, basic. 

Though I will full admit credit for everything, from the frosting, to the cake, to the sprinkles, belongs to the original inspiration and the source of the recipe, Butter & Scotch. This bar and bakery spot in Brooklyn serves up this cake by the slice, along with an extensive list of boozy drinks to wash it down. At the bar, they call this beauty a birthday cake, but I don't see any reason that this can't be a "just because" cake, especially if you reduce the recipe down to a more manageable, mini 4-inch version. 

Or try to, anyway.

Let me tell you about my adventures with this cake! I read a recipe meant for three, 9-inch layers and decided I could reduce it by half and get myself three, 4-inch layers. I still maintain this sounds like reasonable math, but oh my was I wrong. Even after noting to myself the number of eggs and amount of butter and cups of flour involved, I still proceeded as planned and found myself drowning in cake batter. Like, a how am I ever going to use this up amount of it. I can only assume the original recipe would have given me cupcakes for life.

In the end, I baked up two, 4-inch layers, one 6-inch layer and a dozen cupcakes. I froze the cupcakes (then, uh, treated myself for breakfast for a few days) and the 6-inch layer and decided to just go ahead with the rest. But, this cake is a finicky one, and I didn't really like the way one of my 4-inch layers had shrunk during cooling, so I ended up scrapping it (read: stress-eating with my bare hands) and cutting a 4-inch circle out of the 6-inch layer. So, I can really only thank the recipe for ultimately yielding exactly what I wanted, plus extra scraps and a dozen frozen breakfast cupcakes. Yay?

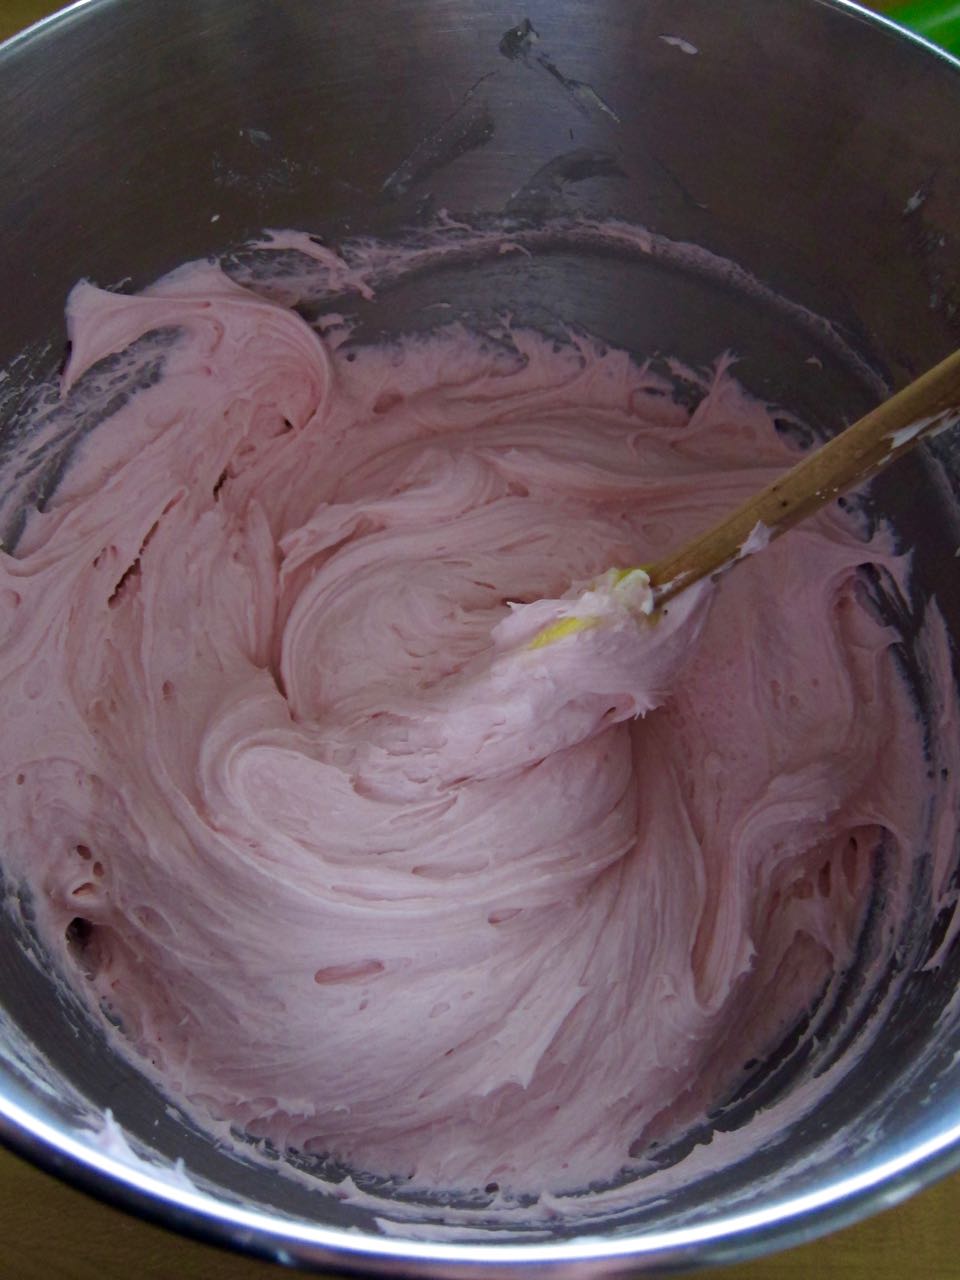
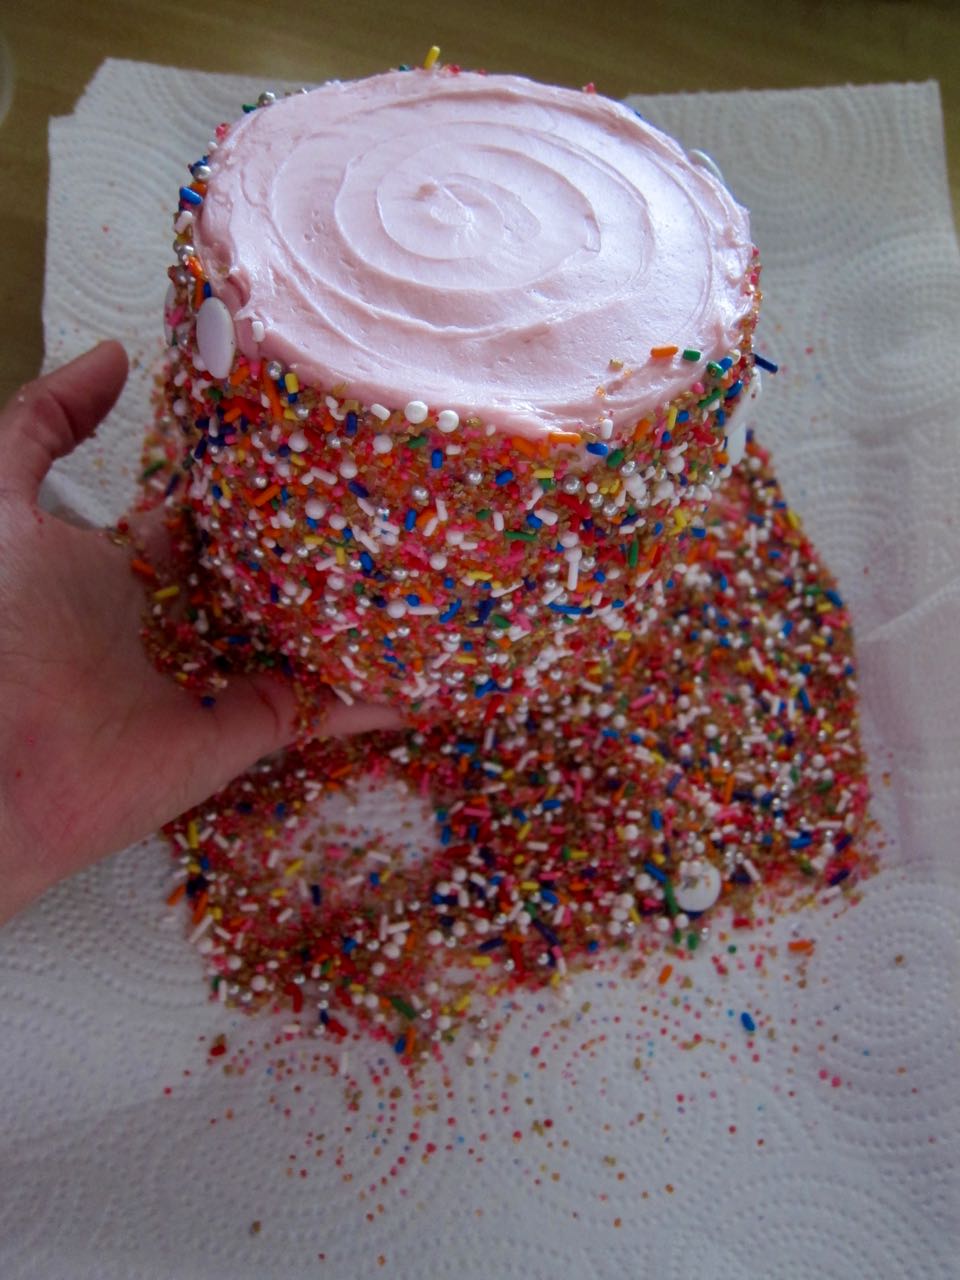
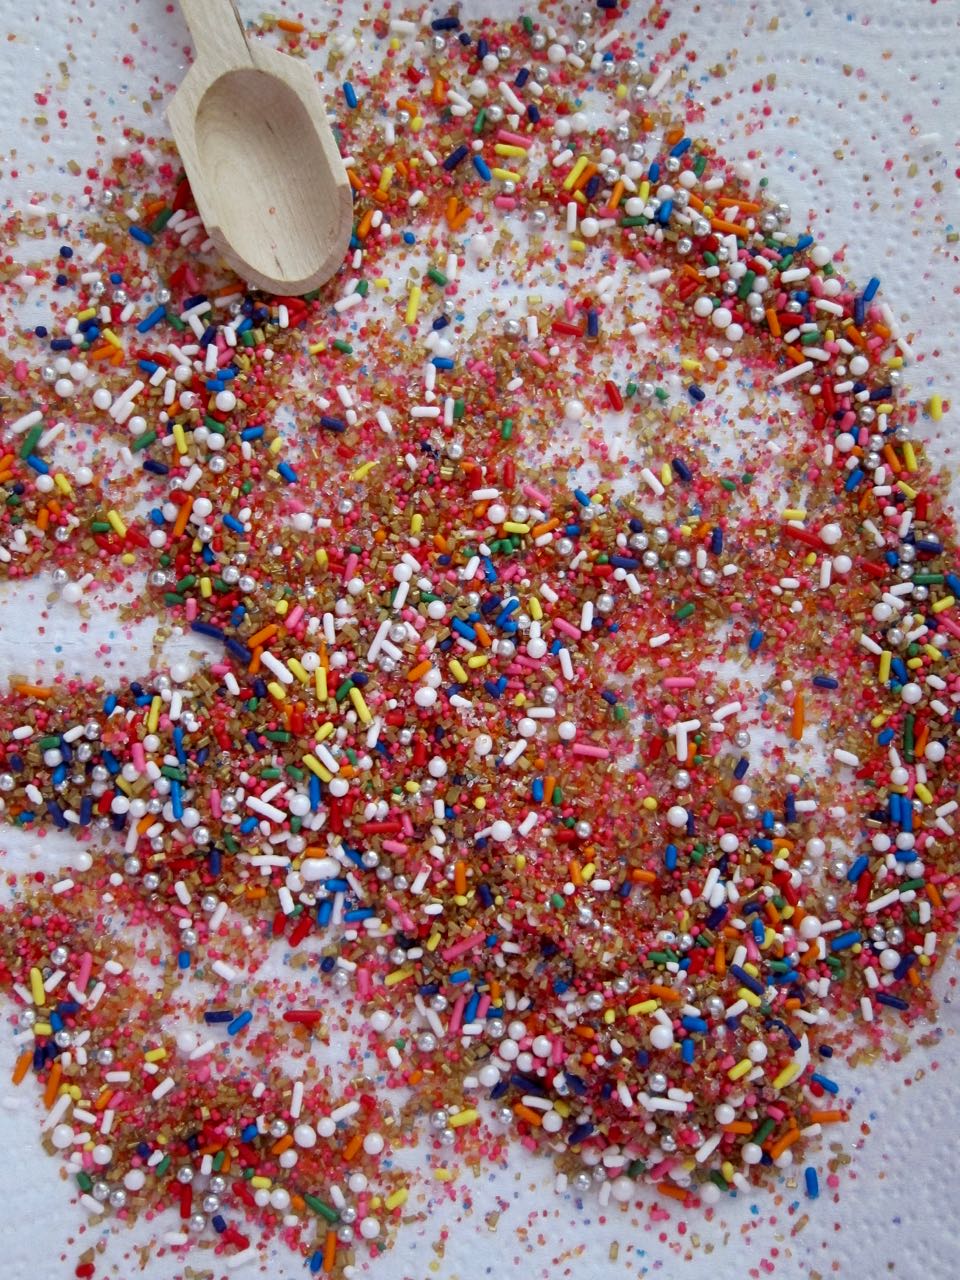
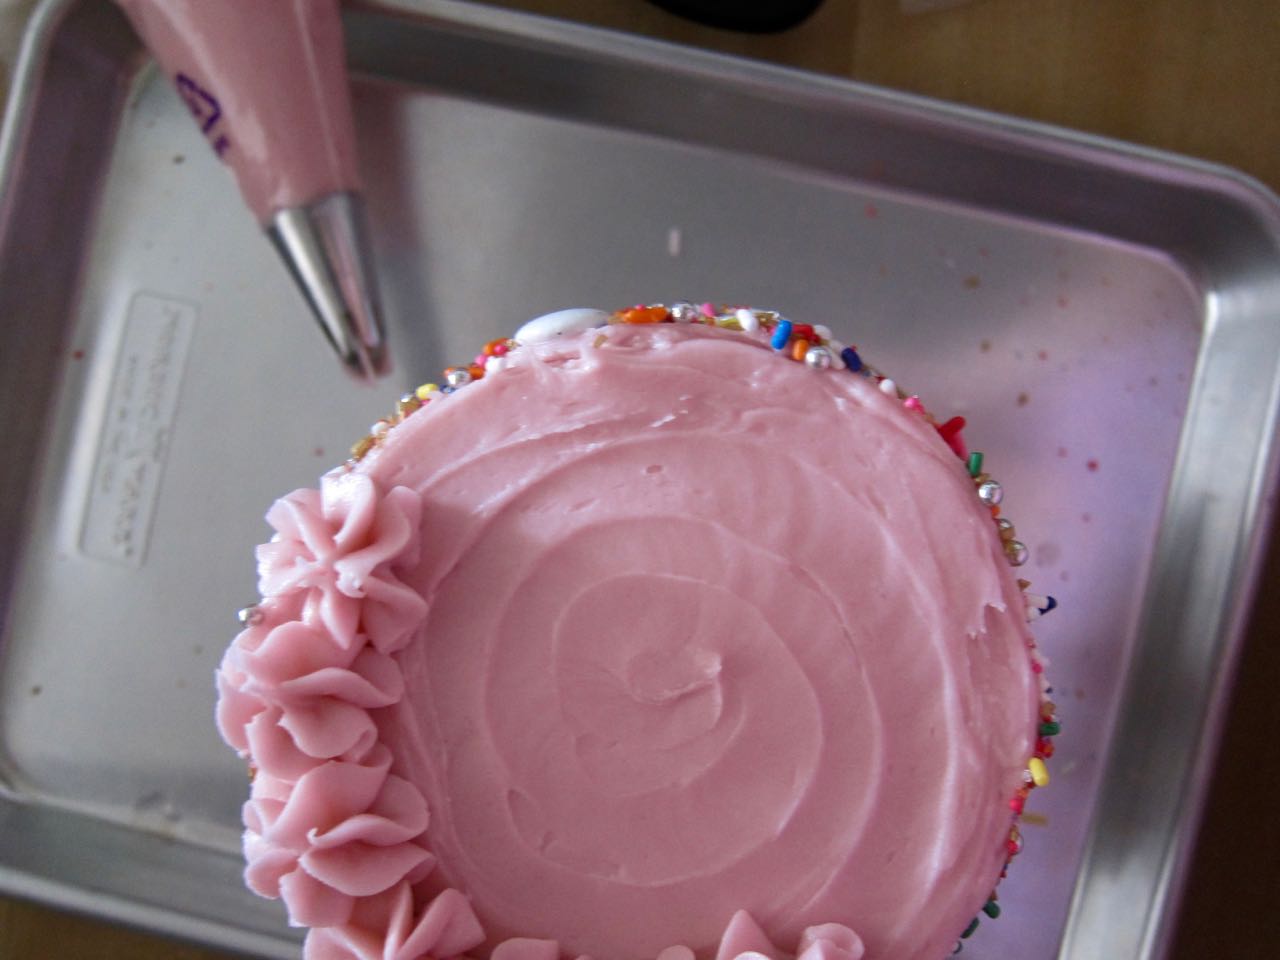
After all that bad math and creative cake-cutting, it was a relief that the frosting was a very straight-forward mix of butter, cream cheese and powdered sugar. That mixed up easily, and I then I just plastered the sides of the cake in sprinkles. So. many. sprinkles. I finally got to use my Amy Sedaris sprinkles and I really felt she would approve. Plus, it really was very validating after all that effort for my cake to say "I like you."

Thank you, cake. I like you too.

I lIke you cake
Amy Sedaris Sprinkle cake
Butter & Cream Cheese Frosting.jpg
Coating a cake in sprinkles.jpg
sprinkle explosion.jpg
piping sprinkle cake.jpg
slice of sprinkle cake

Sprinkles & Frosting Cake

Adapted from Butter & Scotch, original recipe reduced by 1/4 for a 4-inch cake. You may have extra batter.

For the cake:

  • 1/2 cup unsalted butter (1 stick), cold, plus more for greasing pans
  • 1 cup all purpose flour, plus more for dusting pans
  • 1/2 cups plus 3 tbs whole milk
  • 1/2 tbs vanilla extract
  • 1 cup sugar
  • 1 tbs baking powder
  • 1/2 tsp kosher salt
  • 3 egg whites

For the frosting:

  • 1 cup (2 sticks) unsalted butter, room temperature
  • 1/2 pound (1 package) cream cheese, room temperature
  • 1 tbs vanilla extract
  • 1 lb confectioners sugar
  • food coloring, if desired (I used 2 drops each of fuschia and light pink)
  • sprinkles, for decorating
  1. Heat oven to 350 degrees and prepare cake pans. Butter two, 4-inch round cake pans. Dust with a little flour and tap out the extra.
  2. Dice butter into small pieces, about pea-sized, and chill until needed. Warm milk up to room temperature for a few seconds in the microwave, then stir in the vanilla and set aside. 
  3. In the bowl of a stand mixer, combine the flour,  1/2 cup plus 2 tbs sugar, baking powder and salt. Mix with the paddle attachment on low speed for 30 seconds, then add in the cold butter and mix on medium until the butter incorporates with the mixture to form a wet, sandy texture. Lower the speed and add in the milk and vanilla mixture. Transfer batter to a separate bowl and set aside.
  4. Completely clean and dry the mixer bowl and add the egg whites and remaining sugar. Using the whisk attachment, beat on high until soft peaks form. Fold the whites gently into the flour mixture until full incorporated, with no visible white streaks.
  5. Divide the batter between the pans (about 1/2 full) and bake 20-25 minutes, until golden and a cake tester comes out clean. Transfer to a wire rack to cool in the pans for 10 minutes, then gently loosen the cakes from the pans and turn out on the rack to cool completely.
  6. While cakes are cooling, make the frosting: Cream the butter in the bowl of a stand mixer with the paddle attachment, until butter is fluffy. Add the cream cheese 2 ounces at a time while beating butter on medium. When cream cheese is fully blended in, add the vanilla, then lower speed and slowly add in the sugar. When all the sugar is added, add food coloring, if using, then increase the mixer speed to high and beat for 30 seconds, until fluffy and smooth. 
  7. Cut the tops of the cake layers to even the layers if needed, then cut each cake layer in half horizontally. You now have 4 cake layers. Stack the layers, spreading a bit of frosting between each layer, then frost the sides and top as desired. Add sprinkles if you want, and pipe decorative designs with any leftover frosting if you like. Serve and enjoy!
In Recipes, Allie Dreams of Cake Tags Dessert
Comment

Mimosa Cake

March 2, 2018 Allie
Mimosa Cake

It's getting to the point where I've pushed enough cakes on my friends at various social gatherings that they are starting to realize I know how to bake. And upon this realization, we are starting to shift from my forcing them to try various experiments to them asking me to bake cakes for certain occasions.

This is hugely flattering and thrilling, but also extremely terrifying. If I bake and decorate a cake for this blog and it doesn't come out well, then I don't have to post it (sometimes I do anyway). If I bake and decorate a cake for a friend's birthday and it doesn't come out well, then they don't have a birthday cake. It's slightly stressful, to say the least.

Recently, my friend Christiana asked me to make the cake for her bridal shower. This was very clever on her part, because she started by half-seriously asking me to make her actual wedding cake. This request predictably and understandably sent me into a mild panic before she sensibly went with a real bakery. But that meant that when she asked me to make the less important shower cake, I was so relieved I said yes. It was like that classic trick of asking your parents to take you to Italy and then settling for Olive Garden because all you really wanted were garlic breadsticks. She got me good.

And then I had to consider, what was I going to make? There were no real guidelines other than "make something that tastes good", which, duh, and "I like roses". So, after two successful goes with the pink champagne cake, I decided to riff on that and attempt a mimosa cake, because it would be delicious, and the bride does love her a mimosa or two. But the roses? I'd discovered what a pain real flowers can be on a cake with this floral explosion, and I wanted everything to be edible, so I knew I'd be doing frosting roses. 

The only problem? I've never made frosting roses! I had the tools to do them, thanks to my Christmas present from Ginny, but I wasn't sure I had the skill or the patience to learn, no matter how fun Molly Yeh makes it look. But I wasn't going to let Christiana down, so I spend a solid Saturday making rose after rose after rose, before I finally had a bunch of roses I was happy with, and a bunch I could at least call "flower shaped". I was also well on my way to carpal tunnel, but I can worry about that later.

Considering I had to chug some of the leftover champagne before I could let myself decorate, I think in the end it all came out stunning, if I'm allowed to say that.  I impressed myself, at least! I nestled dried cara cara orange, blood orange and tangerine slices between the roses and filled it all in with mint leaves, for a jewel-toned, wintery citrus effect that I LOVED. It is my favorite cake that I've ever decorated by far. And the flavor? That was pretty amazing too! The champagne comes through so well in this cake to help cut the massive amount of sugar in the frosting, and the orange zest and curd laced throughout brought just the right floral, orange note, just like a good mimosa! 

I had to tell some of the ladies at the shower that I don't take orders, this is just a hobby, but I don't know, should I start?

winter citrus mimosa cake
mimosa cake close up
decorating mimosa cake
sliced blood and cara cara oranges.jpg
plain frosted mimosa cake.jpg
making frosting roses.jpg
cake filled with orange curd.jpg
sliced tangerines.jpg
sliced mimosa cake.jpg
Mimosa cake at party

Mimosa Cake

I based the cake off the doubled recipe for the Pink Champagne Cake, left out the pink coloring and added orange zest to the cake and frosting and some orange curd to the filling. The orange curd is adapted from Erin McDowell, with a little lemon juice added for brightness. This recipe makes good use of ingredients. Use your egg yolks for the curd and the whites for the cake, and using three oranges for all the zest and juice needed for the various parts.

For the orange curd:

  • 3 oz unsalted butter
  • 5 egg yolks
  • 1/2 cup sugar
  • 1/2 cup fresh orange juice (about 3 oranges)
  • 1/2 tbs orange zest (from one large orange)
  • 2 tbs lemon juice
  • pinch of salt

For the cake:

  • 3 cups cake flour
  • 1 tbs baking powder
  • 1/2 tsp salt
  • 6 large egg whites, room temperature
  • 1 cup brut champagne, room temperature
  • 2 tsp vanilla
  • 2 tbs vegetable oil
  • 2 cups granulated sugar
  • zest of 1 large orange (about 1/2 tbs)
  • 2 sticks (1 cup) unsalted butter, room temperature

For the buttercream:

  • 4 sticks unsalted butter, room temperature
  • 6 cups powdered sugar, sifted, plus up to 2 cups more if needed
  • 5 tbs brut champagne (room temperature)
  • 1 tsp vanilla
  • zest of 1 orange (about 1/2 tbs)
  1. Make the orange curd: Melt 4 tbs of the butter in a saucepan over medium heat. In a bowl, whisk together egg yolks, sugar, orange juice, orange zest, lemon juice, and salt. Slowly whisk in the melted butter, then pour the mixture into the saucepan over medium low heat. Cook, stirring constantly, until thickened, about 8 minutes. The mixture may still seem thin but should coat the back of a spoon. Remove from heat and stir in the remaining butter. Strain into a shallow container and chill with plastic wrap pressed against the surface, at least 2 hours, but overnight is best. You will probably have leftover curd, but it's ok! Add it to berries, yogurt, toast, scones, whatever.
  2. Make the cake layers: Place rack in center of oven and heat to 350 degrees. Butter and flour three, 8-inch cake pans.
  3. Sift together flour, baking powder, and salt in a medium bowl and set aside.
  4. In a large bowl, add the egg whites, champagne, vanilla and oil and whisk to combine well. Set aside.
  5. In the bowl of a stand mixer, rub the sugar and zest together until sugar is moist and very fragrant. Beat sugar and butter for 3-4 minutes on medium speed until light and fluffy. Add the flour mixture and the egg white mixture, alternating, starting and ending with the dry mix. Scrape down sides of bowl as needed. Divide the batter between pans.
  6. Bake, 23-27 minutes, until cakes are just beginning to pull back from the sides of the pans. Cool on a rack for 10 minutes, remove from pans and cool 30 minutes, or until completely cooled.
  7. Make the frosting: beat the butter on medium speed in the bowl of a stand mixer until creamy, about 1 minute. Add 6 cups powdered sugar, champagne, and vanilla and beat to combine. If needed, add more powdered sugar to make the frosting thicken and become more spreadable. Sprinkle in the zest and beat frosting to fluffy, 30 seconds on medium-high. 
  8. Assemble cake: Level tops of cake layers. Stack layers, spread with a thin layer of 1/2 cup frosting between each and a thin layer of the orange curd. Decorate cake with remaining frosting and any extra decorations as desired (see note). Extra cake can be stored tightly wrapped in plastic in the refrigerator.

Notes:

  • I only spread a thin layer of curd between the cake layers, because my curd wasn't very thick. If you do end up with a thicker curd, you can pipe a frosting dam around the outside of the layers and fill with more curd, for a more prominent presence in the cake.
  • For frosting roses, you can make a smaller batch of the buttercream recipe above, omitting the zest and adding more powdered sugar to make a very stiff frosting. Use a piping bag, a flower nail, and a Number 104 tip to make roses, dyed whatever color you wish. For the orangey peach on my cake, I used a mix of Orange and Yellow gel coloring. I found this and this video to be the most helpful.
  • For the dried citrus slices, cut fruits to 1/4 inch slices or even slightly thinner, then bake on a wire rack set over a baking sheet in a 170-200 degree oven for 6 hours, rotating the sheets every 2 hours. They should still be a bit pliable, or if not, they will be after storing in an air-tight container for a few days. You can then arrange them how you want on the cake, cutting as needed to bend around the roses.
  • If you are adding decorations, reserve 1/3 cup frosting for "glue" before filling and frosting the cake.
  • If you use fresh mint for "leaves", make sure not to add it before the day you are presenting the cake. I had to transport the cake the day before the event and store it in the refrigerator overnight, and my fresh, springy mint wilted a bit.


In Recipes, Allie Dreams of Cake Tags Dessert
2 Comments

Pink Champagne Cake

January 30, 2018 Allie
slice of pink champagne cake

Happy 3 years Tea and Fog! I was so excited I took myself to Japan to celebrate! 

No, that's mostly just coincidence, but it's a nice idea!

At the moment I’m writing this from the bullet train from Kyoto to Tokyo, which makes me feel very professional. Strange, I never do any work en route when I travel for my job! Perhaps they should send me to Japan, where the WiFi so far on public transit has been excellent.

But right now I want to talk about this cake, because oh.my.goodness. is it good! It’s a pink champagne cake, it all its retro glory. I’ve only ever seen it before at the Madonna Inn in San Luis Obispo, where they dye the frosting to more of a neon shade of pink (I opted for more of an off-millennial pink). I didn’t try theirs but now I think I might need to take a road trip. 

Because, don’t let the vintage vibe dissuade you. Fluffy cake gets stacked with a matching, blush-hued buttercream frosting sweet enough to curl your teeth, but the whole sugar rush is tempered by the zing of a dry, pink champagne mixed into both cake and frosting. 

I’ve made this recipe twice so far and it has been perfect every time. My friend Mike told me it was the best cake he’s had in 10 years, which I would take full credit for except I didn’t even tweak the recipe except to halve it (and even the small version is a lot of cake for just me). But I will take points for execution!

It’s perfect for all happy occasions, when you are probably already going to pop a bottle of champagne. Here, you can just add some to the cake and then drink the rest! I made it to celebrate three  years of blogging (because I love celebrating these anniversaries with champagne), but also for New Year’s, and I have plans to adapt it for a fun take on a mimosa for my friend’s bridal shower (shh, don’t tell her). I would also fully endorse just making it for any non-occasion too, it is that good, and since you make the most simple of frostings, it comes together in no time. Fancy decor optional, this cake really sells itself. 

So, I wish I could say I have some big feelings about three years of this blogging thing, but mostly I just feel kind of perplexed, because seriously, where are the years going?? I also have the continual thought that I should be less insane about this whole thing, but…eh. Probably not gonna happen at this point unless someone deletes the list of recipe ideas from my phone. 

NOBODY DO THAT.

But if you are reading, thank you! I love all the forwards, feedback, and advice! 

Pink Champagne cake
pink champagne cake top view
cut pink champagne cake.jpg
sliced pink champagne cake and pink champagne.jpg
pink champagne and cake

Pink Champagne Cake

Adapted from Anne Byrn

For the cake:

  • 1 1/2 cup cake flour
  • 1/2 tbs baking powder
  • 1/4 tsp salt
  • 3 large egg whites, room temperature
  • 1/2 cup brut rose champagne, room temperature
  • 1 tsp vanilla
  • 1 tbs vegetable oil
  • 1 cup granulated sugar
  • 1 stick (1/2 cup) unsalted butter, room temperature
  • pink gel food coloring

For the buttercream:

  • 2 sticks unsalted butter, room temperature
  • 3 cups powdered sugar, sifted, plus up to 1 cup more if needed
  • 2-2 1/2 tbs pink champagne (brut rose)
  • 1/2 tsp vanilla
  • pink gel food coloring
  1. Make the cake layers: Place rack in center of oven and heat to 350 degrees. Butter and flour two, 6-inch cake pans.
  2. Sift together flour, baking powder, and salt in a medium bowl and set aside.
  3. In a large bowl, add the egg whites, champagne, vanilla and oil and whisk to combine well. Set aside.
  4. In the bowl of a stand mixer, beat sugar and butter for 3-4 minutes on medium speed until light and fluffy. Add the flour mixture and the egg white mixture, alternating, starting and ending with the dry mix. Scrape down sides of bowl as needed. Stir in a small amount of pink food coloring to get desired color. Divide the batter between pans.
  5. Bake, 20-25 minutes, until cakes are just beginning to pull back from the sides of the pans. Cool on a rack for 10 minutes, remove from pans and cool 30 minutes, or until completely cooled.
  6. Make the frosting: beat the butter on medium speed in the bowl of a stand mixer until creamy, about 1 minute. Add 3 cups powdered sugar, champagne and vanilla and beat to combine. If needed, add more powdered sugar to make the frosting thicken and become more spreadable. Add desired amount of pink food coloring  and beat frosting to fluffy, 30 seconds on medium-high. 
  7. Assemble cake: Level tops of cake layers. Stack layers, spread with a thin layer of frosting between them, and decorate cake with remaining frosting and any extra decorations as desired.
In Recipes, Allie Dreams of Cake Tags Dessert
4 Comments
← Newer Posts Older Posts →

For those who plan their next meal while eating the last.


INSTAGRAM

🎶When pizza’s on a bagel*, you can have pizza anytime**!🎶

*donut
** after you fry some donuts
FINALLY perfected these Burnt Honey Butter Biscuits & what good timing! It’s carb season & we are all hibernating! 🐻
Final thoughts on Small Thanksgiving: take your sweet potato + marshmallow combo firmly into dessert or even breakfast, and consider a cozy mashed potato soup with stuffing croutons to use up those leftovers. Stay safe & Happy Thanksgiving! 😷🦃
Part 2 of Small Thanksgiving: all the stuff to stuff yourself with! An Italian sausage pasta-inspired stuffing and a vegetarian, spiced wild rice stuffed squash. Everything serves 4-6, gather safely this year! 😷🦃 #thanksgiving #smallthanksgiving #v
Now that we (and the world?) can let out that collective sigh of relief, I can  finally think about my favorite holiday! Everyone is probably (hopefully 😷)looking at smaller gatherings this year, so I’m sending some Small Thanksgiving ideas ou
So happy Disney keeps justifying my dumb baking purchases! This matcha shortbread is delicious, but make a good sandwich cookie it does not. I hid all the broken pieces 🙈
Subscribe to Tea and Fog!

RECENT RECIPES

Featured
polenta with rosemary and goat cheese.jpeg
Salmon Wellington and Warm Rice Salad.jpeg
Pizza Donut Hero.jpeg
Burnt Honey Butter Biscuits.jpeg
Mashed Potato Soup with Stuffing croutons.jpeg
sweet potato donuts with marshmallow frosting.jpeg