• Home
    • Recipes
    • The Roast Chicken Project
    • Allie Dreams of Cake
    • Sunday Suppers
  • Travel
  • About
Menu

Tea and Fog

Street Address
City, State, Zip
Phone Number

Your Custom Text Here

Tea and Fog

  • Home
  • Recipes
    • Recipes
    • The Roast Chicken Project
    • Allie Dreams of Cake
    • Sunday Suppers
  • Travel
  • About

Drunky Bears Gingerbread Cake & Some Thoughts

December 14, 2018 Allie
Drunky Bears Gingerbread Cake

Hello! It’s the end of the year and I guess I’m feeling reflective, so pardon the long, long post! If you just want to read about drunken gummy bears on cake skip below the rest of the photos!

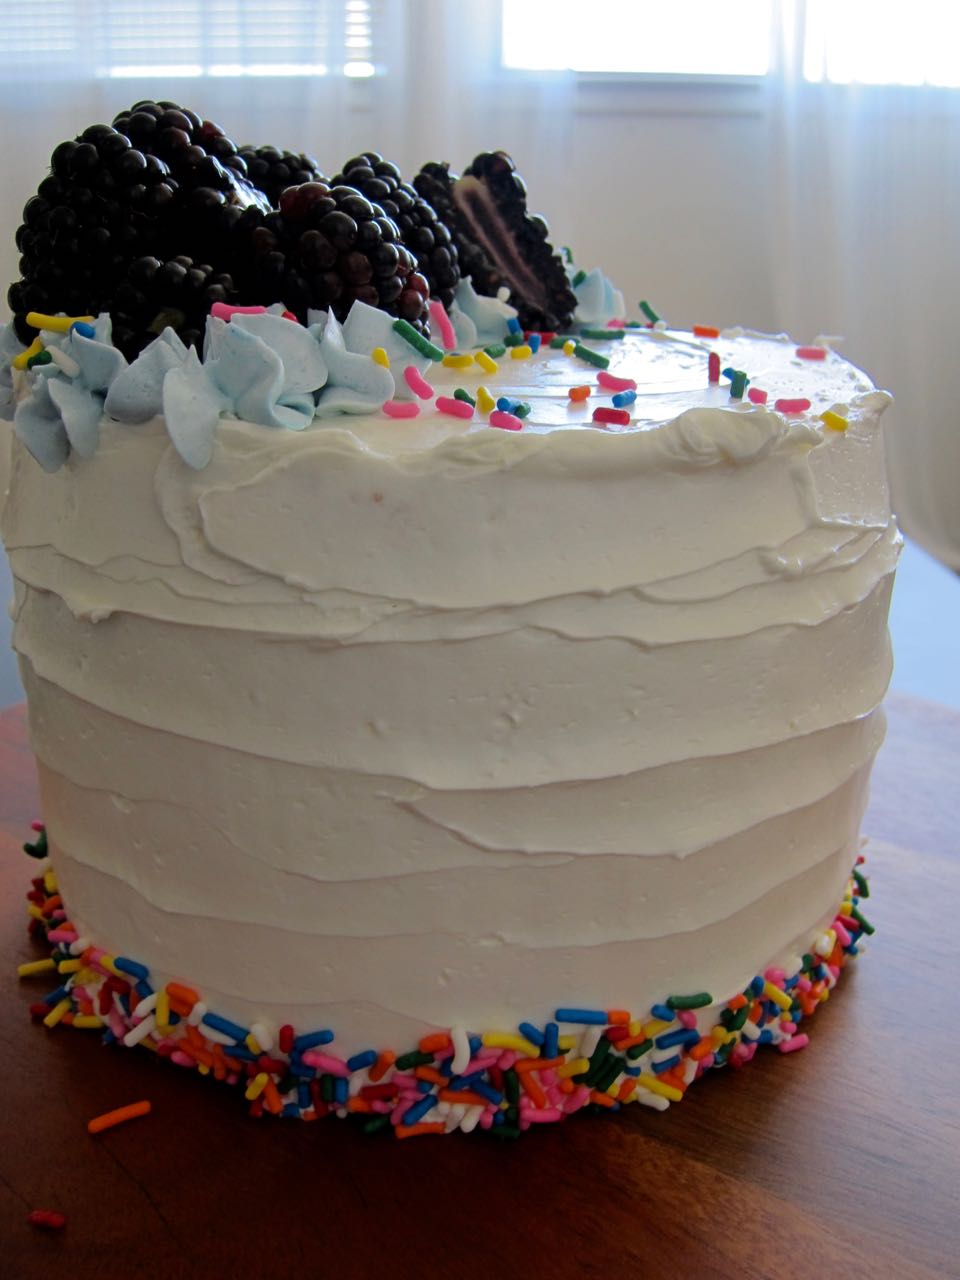
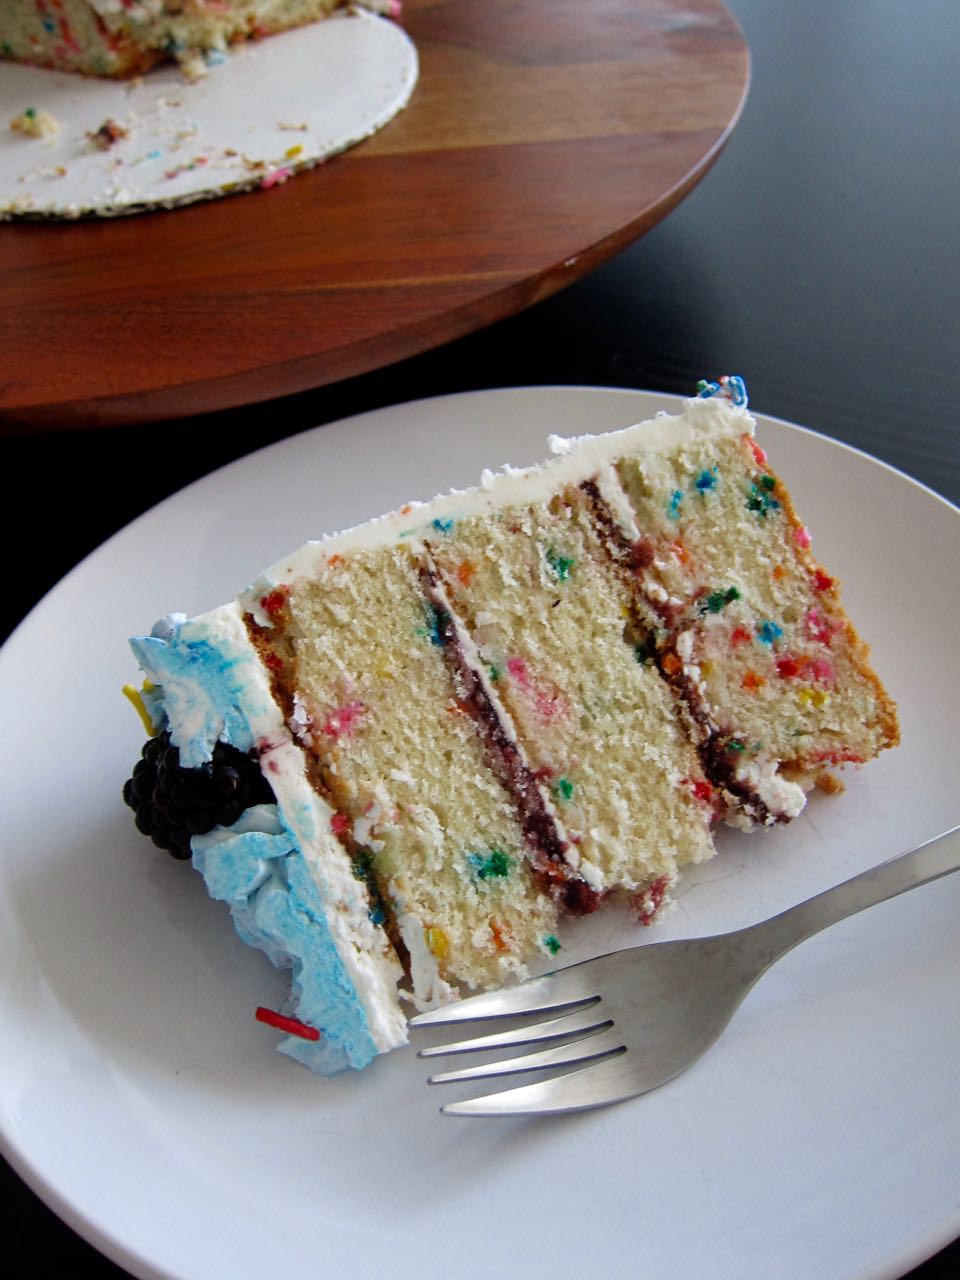
It’s been a bit more than a minute since my last post. I’m realizing as I write this that I dropped a cake here, took a months-long hiatus, and came back with another cake. But it’s fine! Because the seasons have changed and my mood has apparently gone from summery, festive sprinkles and fresh fruit to wintery, boozy delinquent gummy bears.

So why the break? Unlike my last hiatus, I didn’t plan it, but then I made the last cake and it took forever to motivate myself to post about it. And once I did, I just didn’t feel the urge to come back to this space. I didn’t want to take any photos or write up any recipes, and aside from a random small batch of cookies or indulging a brownie craving, I didn’t bake at all for a few months. Who even am I?

Part of that was logistical. I went to Australia again for work and then treated myself to a mini vacation (I will have to post about it because it was unreally beautiful). After almost three weeks of eating every meal out, I came home and only wanted to cook myself salad.

The other part was just mental. I was uninspired and unmotivated, and I simply needed a break. Unchecked, I have a tendency to turn this site into another full time job, and I was starting to feel like I had no time to spend with friends or just myself. Stress is so often self-induced, and I was inducing like crazy.

So, since I’m trying to remove the guilt of letting myself have a break from my 100% self-imposed schedule, I took one!

I erased my editorial calendar. I went to the beach! I went to Waco and celebrated Thanksgiving with friends and ate tacos and brisket and beer. I tried not to panic at not adding fresh content to the site, or not contributing a single recipe to the already over-filled pumpkin/turkey/stuffing ecosystem online. Absolutely no one missed anything, and I got to binge dumb holiday movies on Netflix and go outside on the weekends.

It. Was. Fantastic.

And then, well, I had to decide what to do. Out of habit, I just kept adding ideas to my list of recipes I want to post here, so I obviously hadn’t given up on the idea of the blog. But also, after years of saving spare cash here and there, I finally saved up enough to buy a real lens for the real camera I have stashed in my closet, one that could take my photos from “meh” to “just ok”! I did research, I compared prices, and I came very close to purchasing a lens. And then I paused. Which made me think.

There is a special kind of decision paralysis that comes from fear. And I think that’s what it is. I have fear that I’ll just accidentally walk away from this forever. The truth is it takes a lot of time and energy to product something that pays me $0. Fortunately, I’m not trying to rely on this blog for money, but my time is valuable too. And yet, there is a part of me that doesn’t want all this time and effort to be for nothing. Will creating this only for myself be enough? Will my crappy photos continue giving me feelings of failure? So, I worry that one day I will decide that it’s no longer worth it. And then I’m really going to wish I’d spent that camera money on something else.

See? Paralysis.

I don’t know the answer yet, but I’ll keep posting as I want, with my crappy camera for now. So below, enjoy some “meh” photos of a very not “meh” cake!

Drunky Bears close up
Drunky bears fell off the cake

This cake came from the idea of a traditional holiday fruitcake.

Let me explain.

You know the fruitcake that gets sold with the really gross looking, fluorescent bits of cherry and whatever other stuff that is super seasonally appropriate with bits of green and yellow and red? Yeah, no one wants to eat that. But what people do like to eat, that have a similar color scheme, are gummy bears.

You see where I went with this.

Unfortunately, gummy bears cannot be baked into a cake, since they are like 100% sugar and gelatin, and so have a tendency to melt. But they can be soaked in spiced rum and scattered between two layers of gingerbread cake in a pillowy drift of cream cheese frosting.

Again, you see where I went with this.

This cake is weird. I know it’s weird, you know it’s weird. I almost didn’t bring it to my friend Christiana’s house after telling her I would arrive with dessert, because I looked at the final product and I was momentarily afraid I wouldn’t have friends anymore if I showed up with this cake. But I found my nerve and I’m so glad I did. The cake was a hit!

The orange-scented frosting pairs wonderfully with the dense gingerbread cake, and the boozy gummy bears in the middle, while a bit strong and sharp on their own, meld into the cake so well they almost disappear (Seriously, we couldn’t find them! Either there was a gummy bear thief or they all got pushed into the half of the cake that wasn’t cut. But the little bits we got were fantastic). The gummy bear soaking liquid then gets mixed into a glaze and dabbed onto the cake layers before frosting, for even more rummy goodness. It’s a boozy cake, and it definitely looks a bit drunk, but you can moderate the booze as you like or leave it out entirely. Either way, I’d give the gummy bears a try!

You do not have to decorate your cake with a dystopian scene of drunk gummy bears playing spin the bottle by the fire and sneaking off into the woods to plummet to their deaths, however. I just have a dark sense of humor sometimes and I entertained myself immensely creating my little dark tableau.

Gingerbread cake decorating candy
assembling gingerbread cake.jpg
adding rummy bears to gingerbread cake.jpg
rummy bears.jpg
Sugar Paste Caution signs.jpg
Drunky bears escaping
Drunky bears cake with bonus cake

Drunky Bears Gingerbread Cake with Orange Cream Cheese Frosting

Adapted from Faith Durand. I subbed in date syrup for half of the molasses, which lends a more caramel, less bitter flavor than the blackstrap molasses originally called for, and I added orange zest to the frosting, which adds a floral, citrusy note to the tangy cream cheese.

For the cake:

  • 1 1/2 sticks unsalted butter (12 tbs), cut into a few large chunks

  • 3/4 cup blackstrap molasses (or use regular molasses)

  • 3/4 cup date syrup

  • 3/4 cup brown sugar

  • 1/3 cup white sugar

  • 3 1/4 cup all purpose flour

  • 1/2 tsp kosher salt

  • 2 1/2 tsp baking soda

  • 2 tsp ground ginger

  • 1/2 tsp cinnamon

  • 2 tsp unsweetened cocoa powder

  • 1 tsp vanilla extract

  • 2 eggs, beaten lightly to break up yolks

  • 1 1/2 cups whole milk

For the frosting:

  • 16 oz cream cheese, softened

  • 1/4 cup flour

  • 1 cup sugar

  • 1/4 tsp kosher salt

  • 1 cup whole milk

  • 1 tsp vanilla extract

  • zest of 1 orange

For the boozy gummy bears & rum glaze (very optional):

  • 1/2 cup gummy bears (I like Haribo)

  • spiced rum (or another booze of your choice)

  • powdered sugar

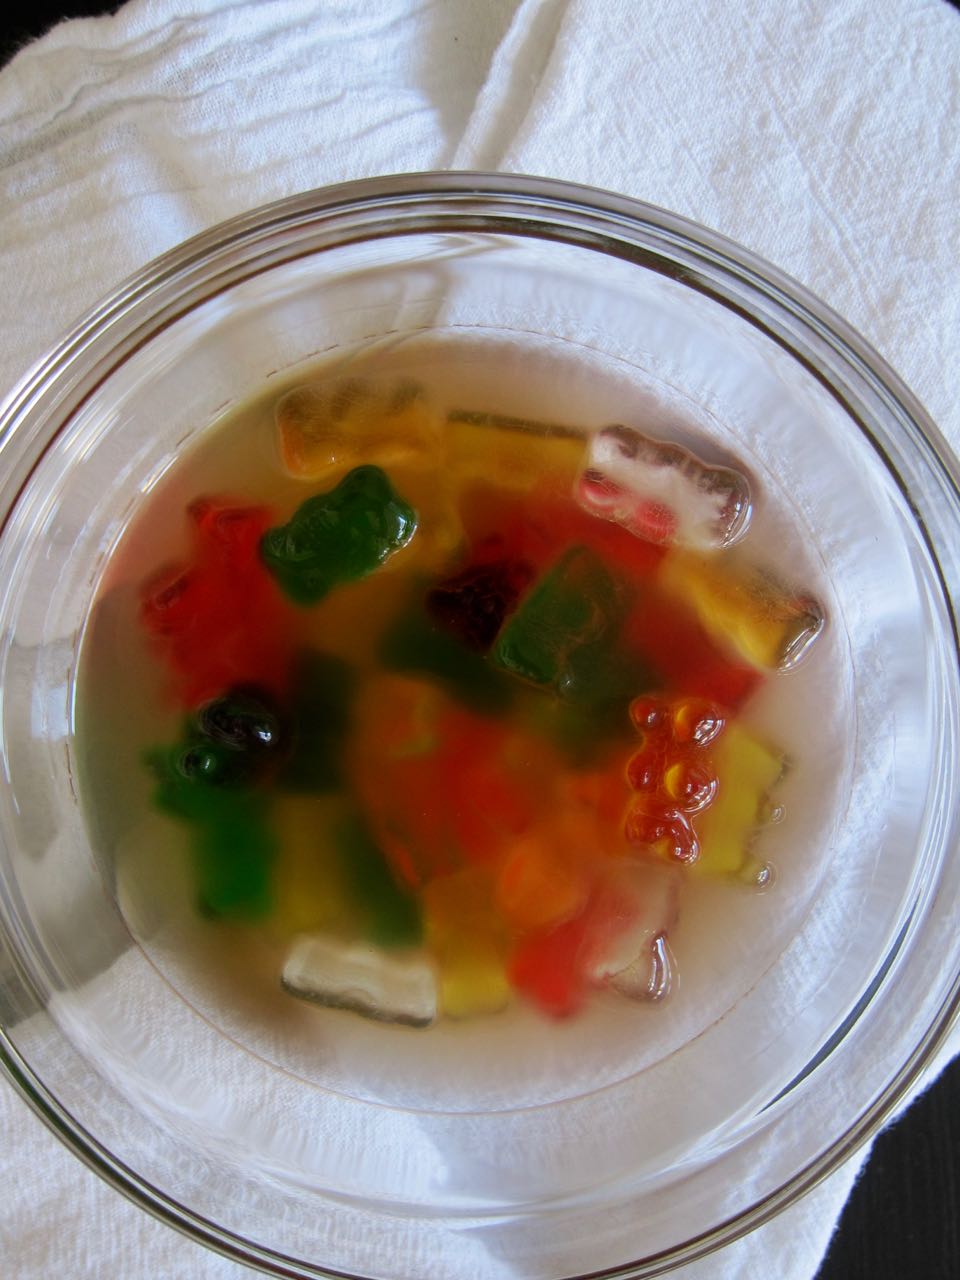
  1. In a small bowl, add the gummy bears and then enough rum to fully cover the gummies. Transfer to the refrigerator to soak, at least 5 hours but more if you want. The longer they soak the mushier they will get, and the boozier too.

  2. Make the cake. Heat oven to 350 degrees and butter two 8-inch cake pans (see notes). In a pot over medium heat, add the butter, molasses and date syrup, and the sugars. Whisk everything together until smooth and the sugars have dissolved. It should not look grainy and the butter should be completely melted. Remove from heat and set aside to cool.

  3. In a large bowl, whisk together the salt, flour, spices, baking soda, and cocoa. Add the vanilla, eggs, and milk to the cooled molasses mixture (it helps to add the milk first to make sure you won’t be scrambling your eggs!) and whisk to combine. Pour the liquid into the dry mixture and whisk until completely combined and smooth. The batter will start to bubble a bit as the baking soda reacts, so work quickly so you can save that action for the oven.

  4. Divide the batter between prepared cake pans, reserving some for a little mini cake or cupcakes, or discard, (or bake it all in the 8-inch pans, just allow for longer baking times). Bake for 35-40 minutes (test for doneness at 35) until a toothpick inserted in the center comes out clean. Cool for 30 minutes in the pans and then run a knife around the edges of the cakes and invert to cool completely on a wire rack.

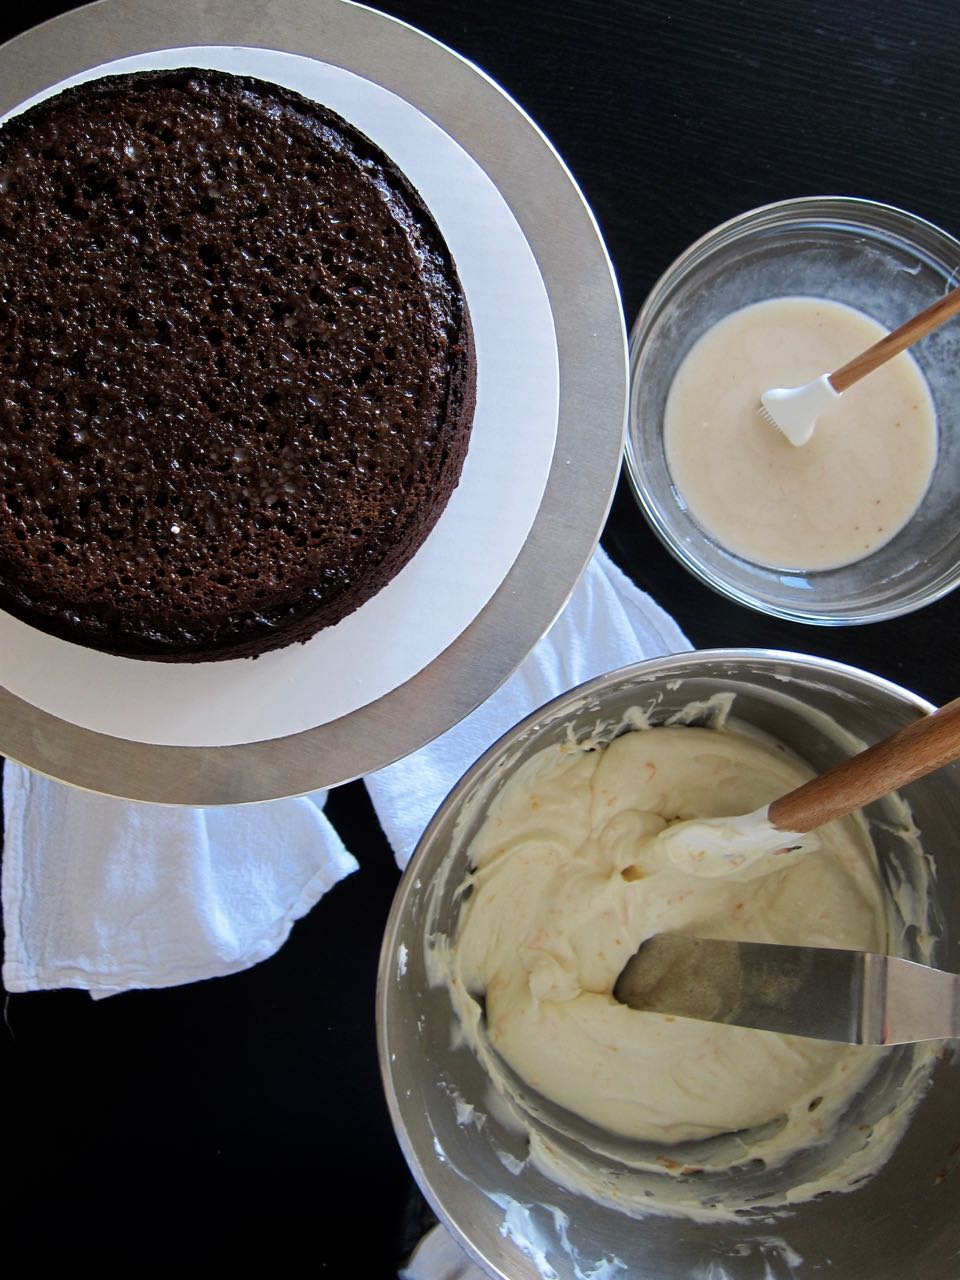
  5. While the cakes are cooling, make the frosting. Using a mixer, whip the cream cheese until smooth and fluffy on high speed for several minutes, then scrape into another bowl and set aside.

  6. In a pot over medium heat, add the flour, sugar, salt and milk and whisk until smooth. Keep whisking as you bring the mixture to a simmer. It will thicken up once it reaches a simmer, and keep it bubbling for another minute, then pour into the mixer bowl. Beat the mixture on high speed for 10 minutes, until cool and lightened up a bit.

  7. While the mixer is running on medium speed, slowly beat in the cream cheese until everything is smooth and combined. Add the vanilla and orange zest and beat until smooth. Transfer to the fridge to chill and firm up a bit. When ready to use, beat it with the mixer again or give it a few vigorous turns with a rubber spatula or wooden spoon.

  8. Assemble the cake: when layers are cool, level them if needed. Drain the gummy bears and reserve the soaking liquid. To the liquid, add enough powdered sugar to create a thin glaze, then apply as liberally as you want to the leveled cake layers. If you want it super boozy skip this step and just add the rum. It’s the holidays!

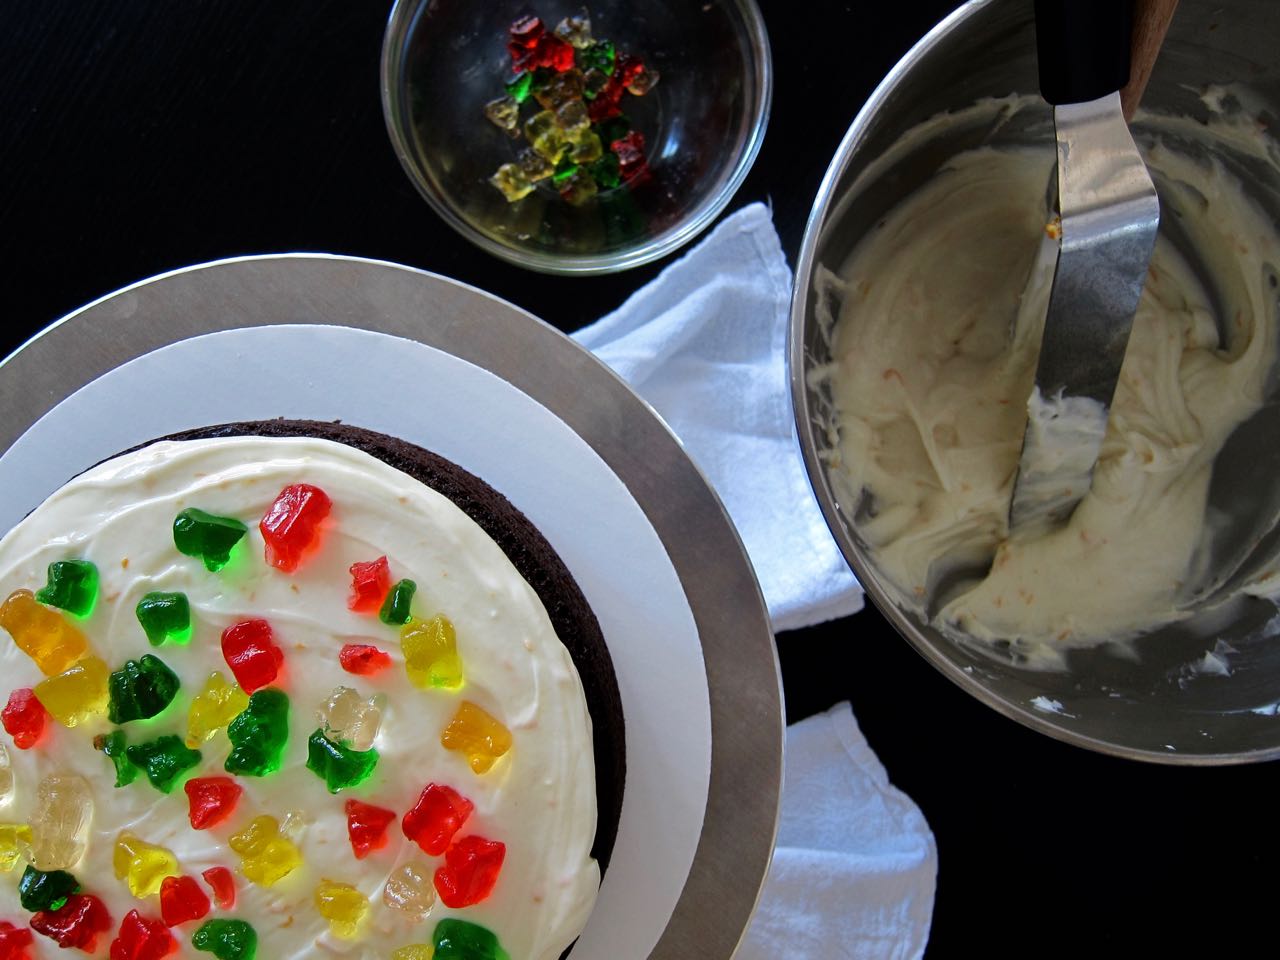
  9. On top of one of the glaze layers, spread half of the frosting. It will seem like a lot but the cake demands it. Scatter your boozy gummy bears on top of the frosting. I chopped them up a little to help with this, but you can leave them whole too. Top with the second layer, and spread the remaining cream cheese frosting on top.

  10. Decorate if you wish with more gummy bears or other candy. Follow those gingerbread house vibes!

Notes:

  • The original recipe calls for using two 9-inch cake pans, but 9-inch is huge, and I only have 8-inch pans anyway. I originally tried to reduce the recipe to yield less batter for the 8-inch rounds, but that resulted in wonky measurements, so I left the original amounts called for in the recipe and just baked off a little mini cake with leftover batter. Based on the thickness of the cake layers, I probably could have just halved the recipe and baked two thinner layers in the 8-inch pans, so there are options. Just make sure you adjust oven times if you are baking thinner or thicker layers. I’d start checking around 25-30 minutes for doneness with thin layers and be prepared to bake longer than 40 minutes for thicker layers.

In Recipes, Allie Dreams of Cake Tags Dessert
Comment

Funfetti & Blackberries Cake

September 28, 2018 Allie
Funfetti & Blackberries cake

It’s that time of year! The calendar has officially turned from Summer to Fall. There are bins of pumpkins overflowing outside every grocery store I frequent, retail decor is ranging from Halloween to Christmas, and Trader Joe’s is an explosion of Pumpkin Spice EVERYTHING.

Meanwhile, Karl The Fog has taken his annual vacation (or seems to be thinking about it at least), which means it is finally SF Summer, which means I’m coming at you today with blackberries! And sprinkles!

(I love fall, but if I can’t wear sweaters yet then nobody gets pumpkin anything from me.)

I made this cake twice. The first time, I was supposed to make it for my friend Mercedes’s baby shower, but then she unexpectedly went into labor the day before, and so I was off the hook, but still kind of had it in my head that I wanted to make a cake. So I made a tiny taste-test version for myself, and then, when I saw Mercedes a couple weekends ago, I made her a bigger version, because I felt that after having a baby, especially after that, she still deserved a cake!

I’m really happy I had multiple opportunities to test this one out! I knew I wanted to combine funfetti with blackberries, exactly the way Salt and Straw did it with their Birthday Cakes and Blackberries seasonal flavor earlier this Summer. It sounds weird, but the tart blackberries really compliment the sugar high of vanilla and sprinkles, and together, they make magic.

But which funfetti recipe to use? Claire and I made the Milk Bar recipe for our royal wedding viewing earlier this year, and it was so, so good, but I’d also been wanting to make the other funfetti cake that broke the internet, and try out Molly Yeh’s recipe. So I tried both! For the first taste test version, I made a mini version of Molly’s cake, but using with swiss meringue buttercream to cut down on the sweetness and real vanilla extract. For one, I couldn’t find any clear imitation vanilla in the store (but I did find butter extract. Excuse me, WHO is using this???) and I also thought that maybe real vanilla would pair better with the blackberries. It was tasty, but fussier to make, with the need to separate eggs and bake the layers in separate pans.

So, for the second version, I went back to the Christina Tosi cake, baking up the batter in a quarter sheet pan, then stamping out the layers with a 6-inch cake ring. I used the milk soak she calls for, and the swiss meringue buttercream again, but this time I flavored everything with clear imitation vanilla (which I now own a full 32 oz of, if you know anyone who needs some). I LOVED this one! The milk soak keeps everything moist, the imitation vanilla gives you exactly that nostalgic funfetti flavor we all remember, the frosting isn’t too sweet, and the blackberries zipped right through everything.

The result was festive and summery and full of both jammy and fresh berry flavors. It’s a new favorite for me, and I was going to use the leftovers in my freezer to hang on to Summer as long as the weather stayed hot,* but then the weather cooled down. And also, I ate all the cake.

*AKA, mid-70s. Sorry, I am ruined.

slice of funfetti & blackberries cake
top view funfetti & blackberry cake
blackberry and funfetti cake.jpg
sliced funfetti and blackberry cake.jpg

Funfetti & Blackberries Cake

Cake layers adapted from Christina Tosi.

For the cake:

  • 1/2 stick unsalted butter, softened to room temp

  • 1/3 cup vegetable shortening

  • 1 1/4 cup granulated sugar

  • 3 tbs, tightly packed, light brown sugar

  • 3 eggs

  • 1/2 cup buttermilk

  • 1/3 cup grapeseed oil

  • 2 tsp clear imitation vanilla

  • 2 cups cake flour

  • 1 1/2 tsp baking powder

  • 3/4 tsp kosher salt

  • 1/4 cup plus 2 tbs rainbow sprinkles (see note)

For the swiss meringue buttercream:

  • 4 egg whites

  • 1 1/4 cup sugar

  • 3 sticks butter, unsalted, room temp

  • 1 tsp clear imitation vanilla

For assembly:

  • 1/4 cup milk

  • 1 tsp clear imitation vanilla

  • blackberry jam, good quality

  • blackberries, for decorating

  • sprinkles, for decorating

  1. Bake the cake: Heat oven to 350 degrees. Spray a quarter sheet pan with cooking spray and line with parchment. Set aside.

  2. In the bowl of a stand mixer, combine the butter, shortening, and sugars and beat on medium-high for 2-3 minutes, scraping down as needed, and then add the eggs and beat another 2-3 minutes on medium-high.

  3. Turn the mixer to low and pour in buttermilk, oil and vanilla extract. With speed on medium-high, beat for 4-6 minutes, until the mixture is very, very pale, almost white, and almost doubled in size. When you see no more streaks of fat or liquid in the batter, it is ready for the dry ingredients. Add the cake flour, baking powder and salt, as well as the 1/4 cup of sprinkles, and mix for no more than a minute, just until everything comes together.

  4. Spread the batter evenly into the prepared cake pan and then sprinkle with remaining sprinkles. Bake 30-35 minutes, until puffed and no longer jiggling in the middle. Cool cake completely in the pan, on a wire rack.

  5. Make the frosting: Set bowl of mixer over a pot of simmering water, and add the egg whites and sugar and whisk to combine. Continue whisking until sugar dissolves and mixture is very warm to the touch, or reached 160 degrees on an instant read thermometer.

  6. Transfer bowl to stand mixer and beat egg white mixture with the whisk attachment on high speed to stiff but not dry peaks. Continue beating until fluffy and cooled, 6 minutes.

  7. Switch to the paddle attachment and beat on medium-low speed, adding the butter a bit at a time, beating well after each addition. Beat in the vanilla and then beat on low speed for about 2 minutes more, to reduce any air bubbles.

  8. To assemble: with a 6-inch cake ring, cut rounds out of the cooled cake, one at the top left corner and one at the bottom right corner. Then cut two half circles as large as possible out of the scraps. Dab a bit of frosting onto the center of a 6-inch cake board, and place in the cake ring. Place the two semi circles in the ring, then fill in the gap in the middle with some of the remaining cake scraps. You want to pack it tight so it forms a sturdy base layer.

  9. In a small bowl, mix together the milk and vanilla, then brush 1/3 of the mixture onto the cake layer. Spoon a layer of frosting over the soaked cake, then a few small spoonfuls of the jam. Top with the next cake layer and repeat. Top with remaining cake layer, brush on remaining milk soak, and then frost the cake as desired. You should have enough frosting to fully cover and do some fun piping if you want. Top with fresh blackberries and more sprinkles and enjoy!

Notes:

  • When shopping for rainbow sprinkles, go with the bright, neon, artificially colored ones. This is not the time for natural sprinkles. Also? Check the ice cream aisle! You will probably find much bigger containers of sprinkles, and cheaper than the little vials sold in the baking aisle. But check both! I’ve found the same large tub of rainbow sprinkles in both aisles in the past.

In Recipes, Allie Dreams of Cake Tags Dessert
Comment

A Birthday Cake for Harry

July 31, 2018 Allie
Harry Potter Birthday Cake

Happy Birthday Harry Potter!

Excuse me while my nerd flag flies high, but I love any excuse to stress bake a cake, and when I realized a certain fictional wizard's birthday was coming up, I decided to get a little whimsical. July 31st, aka, today, is the Chosen One's birthday, and why not recreate the cake Hagrid gave him for his 11th birthday? Mushed appearance and sausage links included too! 

It feels extra fun to celebrate this year, with more than just a Snapchat filter, because this September is also the 20-year anniversary of Harry Potter and the Sorcerer's Stone being released in the US. So in honor of that, enjoy this version of the "sticky chocolate cake" from the book! 

(I know the movie version was way more aesthetically attractive with its pink frosting and wacky spelling, but I'm going with the book description today. Maybe I'll make that other version in 2021.)

Happy Birthday Harry Chocolate Cake

Devils Food Cake

Adapted from Bravetart. Makes one, two-layer, 6-inch cake. This is the easiest chocolate cake ever. It all comes together in one pot, no special equipment necessary. 

For the cake:

  • 1 1/2 sticks butter
  • 3/4 cup strong black tea, such as Assam (see note)
  • 1/2 cup dutch process cocoa
  • 3 oz good quality dark chocolate
  • 1 cup light brown sugar
  • 1/2 tbs vanilla extract
  • 1/2 tsp kosher salt
  • 3 eggs + 3/4 oz egg yolks (about 1 1/2 tbs)
  • 1 cup flour
  • 1/2 tbs baking soda

For the Chocolate Ganache frosting:

  • 1 1/2 cup heavy cream
  • 10 oz milk chocolate
  • 1/8 tsp kosher salt

For any written decoration (optional)

  • 2 tbs softened butter
  • 3/8 cup powdered sugar, sifted
  • splash of vanilla extract
  • food color of choice
  1. Heat oven to 350 degrees. Line two 6-inch cake pans with parchment and spray with cooking spray. Set aside.
  2. In a large pot, combine the butter and black tea over low heat. When the butter is melted, remove from heat and whisk in the chocolate and the cocoa powder, then the brown sugar, vanilla, and kosher salt. Stir in the eggs and the yolks, then sift in the the flour and baking soda. Combine thoroughly, then divide between the two cake pans.
  3. Bake for 25-28 minutes, until cakes pull away from the edges of the pans a bit and a toothpick or skewer inserted into the cakes come out with only a few crumbs. Cool the cakes in the pans completely, then turn out and level tops as needed.
  4. When cakes are completely cool, make the frosting. Heat the heavy cream in another pot over medium heat until steaming and starting to bubble. Place the chopped milk chocolate in the bowl of a stand mixer and pour the cream over top. Whisk until smooth and chocolate is melted, then whisk in the salt. Set aside until cooled a bit, then cover and refrigerate at least 6 hours, or until mixture reaches 45 degrees. You can also set the bowl in an ice bath for an hour, stirring occasionally. When frosting is cooled to desired temperature, whip with the whisk attachment on medium-high, about 75-120 seconds, until thick and fluffy like frosting. Use immediately.
  5. Frost cake as desired.  If writing any messages on cake, beat together butter and powdered sugar, add vanilla and stir to combine. Color as desired, and transfer to a piping bag or ziploc bag. Cut off the tip and pipe away! Serve cake immediately, or keep at room temperature, covered, for up to one day, and sliced, wrapped in plastic, at room temperature for up to four days.

Notes:

  • You can use strong coffee in the place of the tea. The original recipe called for either, and I went with the tea because unlike coffee, I always have some in my house, and also, tea felt more British, in honor of Harry.


In Recipes, Allie Dreams of Cake Tags Dessert
Comment
← Newer Posts Older Posts →

For those who plan their next meal while eating the last.


INSTAGRAM

🎶When pizza’s on a bagel*, you can have pizza anytime**!🎶

*donut
** after you fry some donuts
FINALLY perfected these Burnt Honey Butter Biscuits & what good timing! It’s carb season & we are all hibernating! 🐻
Final thoughts on Small Thanksgiving: take your sweet potato + marshmallow combo firmly into dessert or even breakfast, and consider a cozy mashed potato soup with stuffing croutons to use up those leftovers. Stay safe & Happy Thanksgiving! 😷🦃
Part 2 of Small Thanksgiving: all the stuff to stuff yourself with! An Italian sausage pasta-inspired stuffing and a vegetarian, spiced wild rice stuffed squash. Everything serves 4-6, gather safely this year! 😷🦃 #thanksgiving #smallthanksgiving #v
Now that we (and the world?) can let out that collective sigh of relief, I can  finally think about my favorite holiday! Everyone is probably (hopefully 😷)looking at smaller gatherings this year, so I’m sending some Small Thanksgiving ideas ou
So happy Disney keeps justifying my dumb baking purchases! This matcha shortbread is delicious, but make a good sandwich cookie it does not. I hid all the broken pieces 🙈
Subscribe to Tea and Fog!

RECENT RECIPES

Featured
polenta with rosemary and goat cheese.jpeg
Salmon Wellington and Warm Rice Salad.jpeg
Pizza Donut Hero.jpeg
Burnt Honey Butter Biscuits.jpeg
Mashed Potato Soup with Stuffing croutons.jpeg
sweet potato donuts with marshmallow frosting.jpeg